Quickstart: Your First Blueprint in 15 Minutes
Go from cluster login to a live Hello World page and a JSON API endpoint: created, activated, and tested with blueprints, without writing backend code.
In this quickstart you build two things on your cluster: a page that renders "Hello World" in the browser, and an API endpoint that returns it as JSON. Along the way you practice the four moves every RUAL developer uses daily: creating a blueprint, placing and connecting blocks, activating, and testing in development view.
1. Prerequisites
Before you start, you need:
- A cluster URL. The address of the RUAL cluster you will build on.
- A username and password authorized for RUAL Studio access. If you don't have an account yet, an existing administrator creates one for you. See Getting Access.
You work in RUAL Studio, the web application at rual.at. Log in with your cluster URL and credentials to open your cluster.
2. Create Your First Blueprint
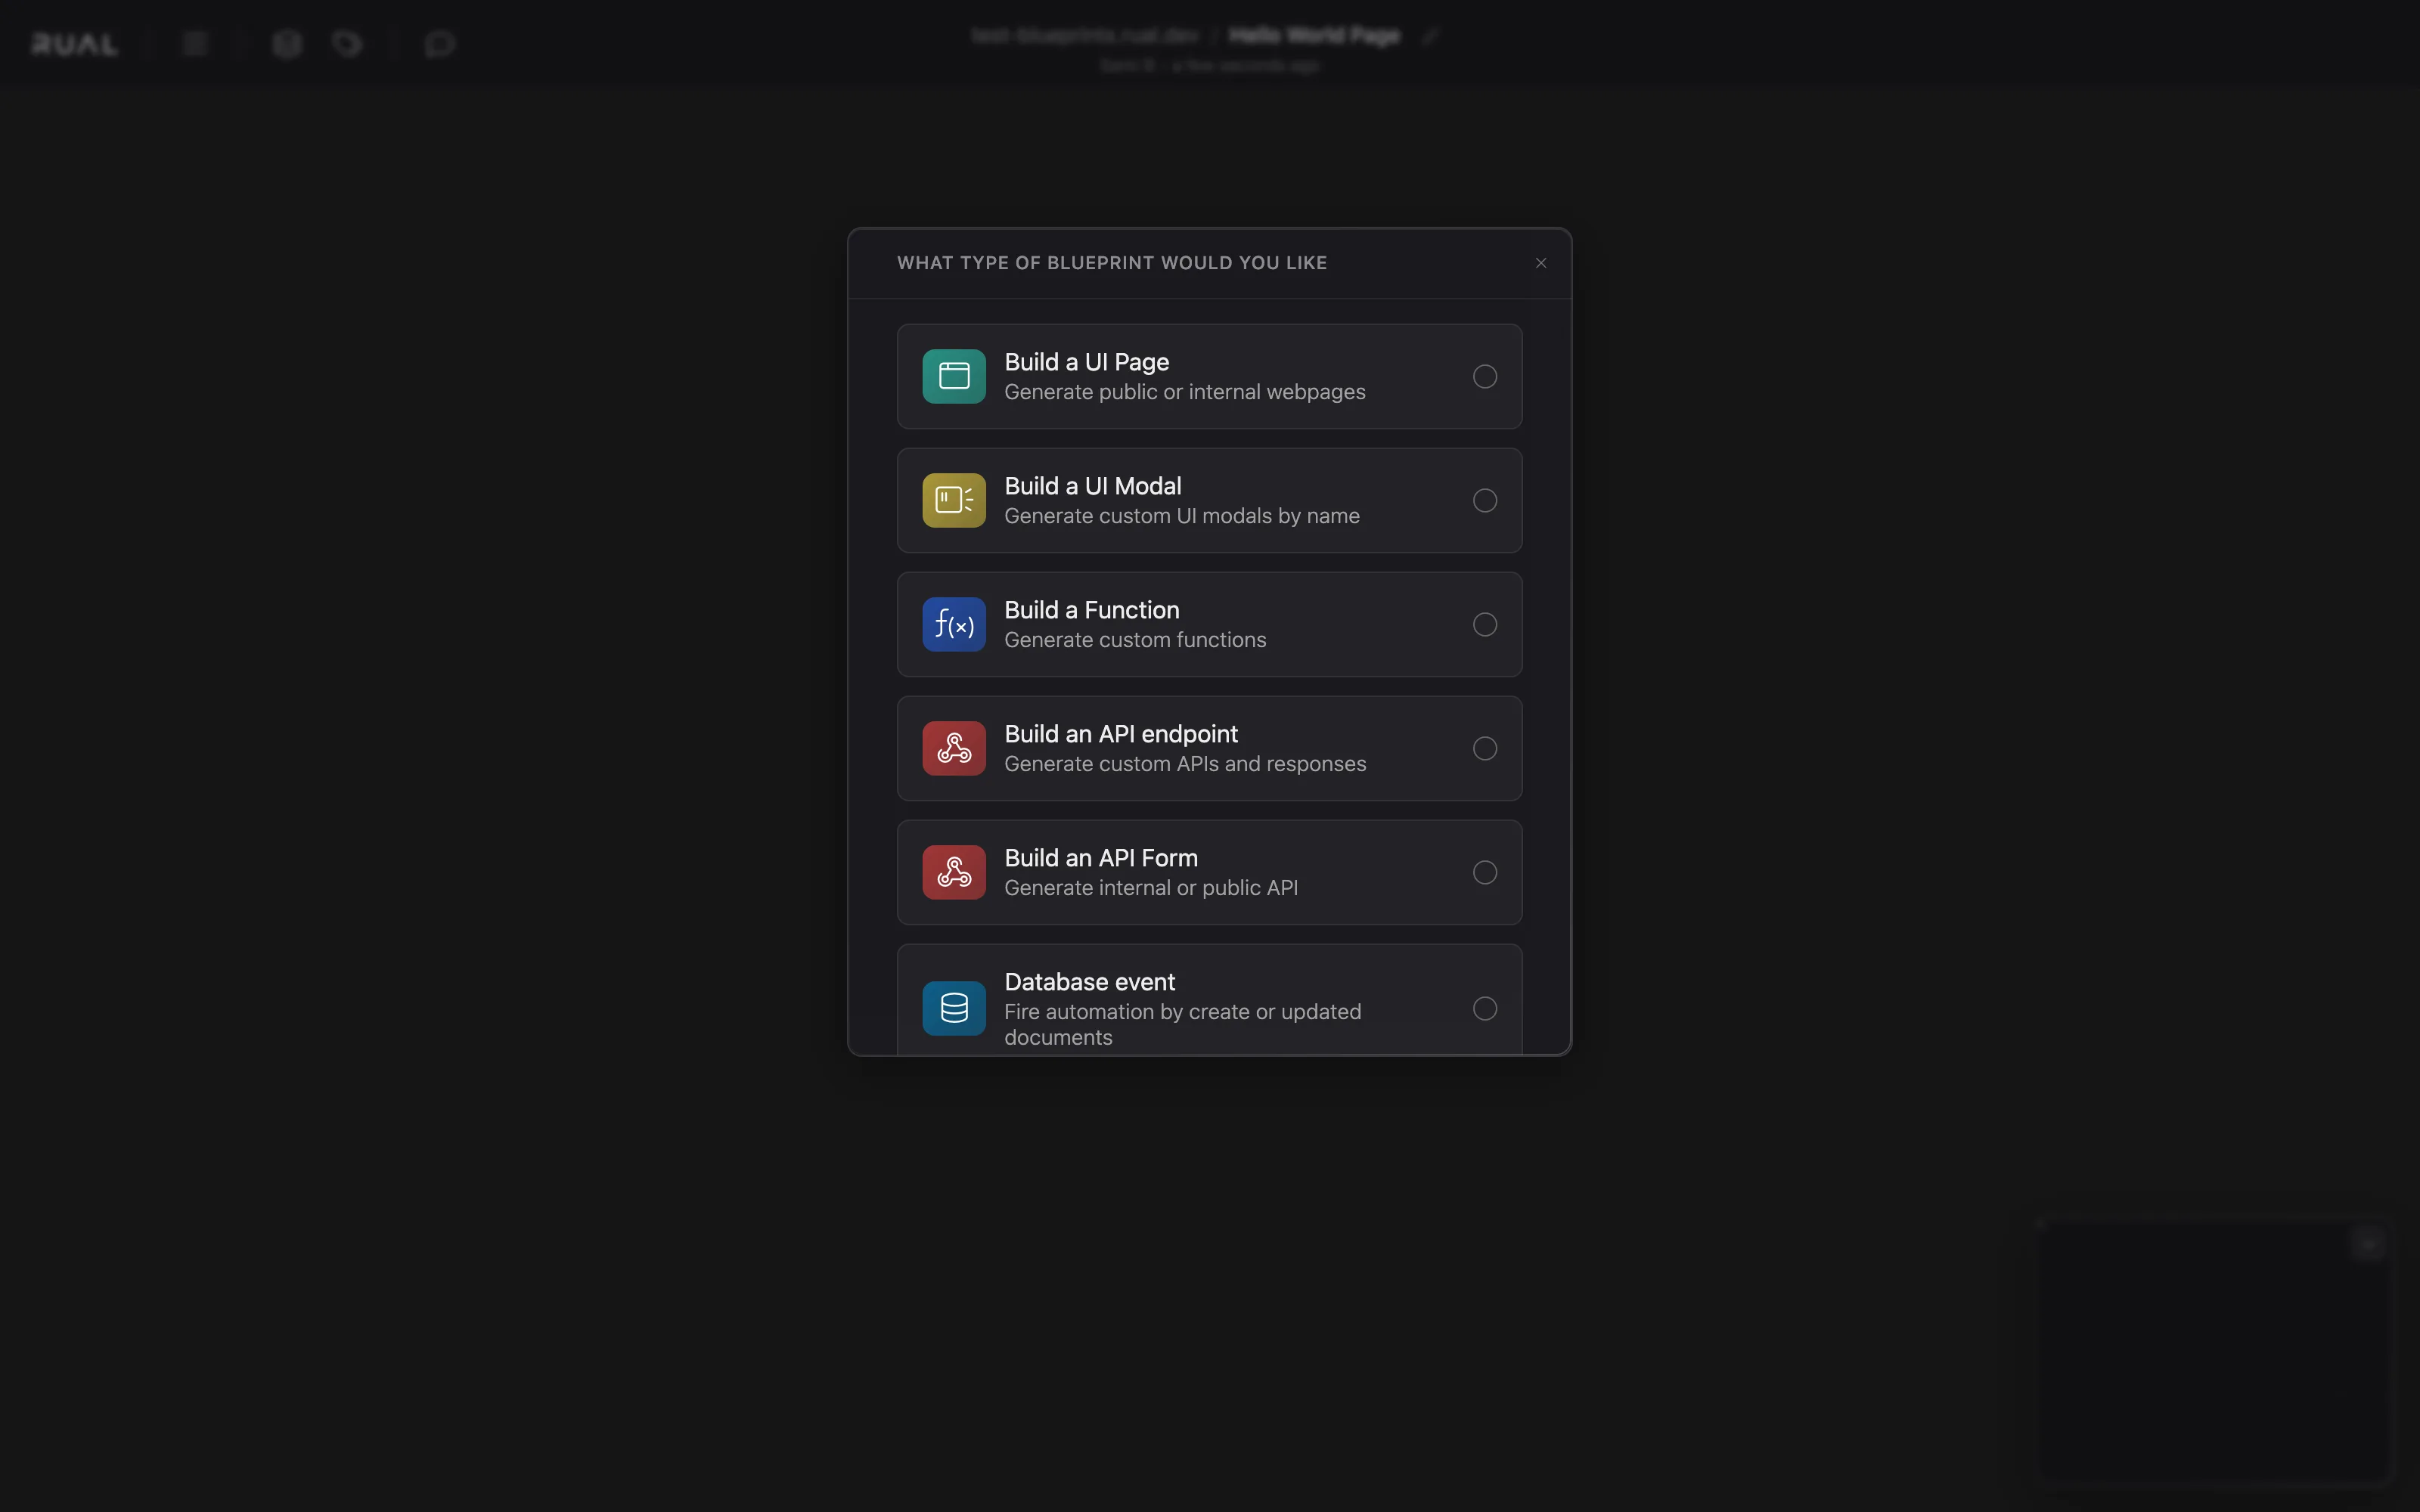
All logic in RUAL lives in blueprints: large canvases where you place blocks and connect them into flows. Open the blueprints overview in RUAL Studio and create a new blueprint. RUAL first asks what type of blueprint you would like; the chosen type pre-arranges the canvas with the right starting blocks.
- Choose
Build a UI Page. This seeds the canvas with astate_pageblock, the starting block of every page flow. - Give the blueprint a clear name, for example
Hello World Page. One blueprint per component is the convention, similar to assigning a single class to a file in traditional coding. - The canvas opens. Set the URL on the
state_pageblock, for example/hello-world.
3. Build the Page
A page flow needs a render block and at least one element to display. You will use four blocks:
| Block | Display Name | Role |
|---|---|---|
state_page |
new page | Starts the flow when someone opens /hello-world. |
state_render_page |
render | Sends the combined HTML to the frontend and renders the page. |
state_h1 |
h1 | The heading element that displays your text. |
value_default |
value | Holds a fixed text value, here Hello World. |
Now wire them together:
- Add the render block. Left-click the
flowout-pin ofstate_page, drag into an empty area of the canvas, and pickrenderfrom the search results. The connection is established automatically. Also drag theConnectionout-pin onto the render block'sconnectionin-pin. - Set title and description. The render block requires a
titleand adescription.Right-clickthe canvas, chooseAdd new block, add avalue_defaultblock for each, and connect them. - Add the heading. Add a
state_h1block the same way and connect itsstateout-pin to the render block'scontentin-pin. - Set the text. Add one more
value_defaultblock, typeHello Worldinto it, and connect it to the h1 block'stextin-pin. - Save. Use the
Savebutton in the bottom bar, orCmd/Ctrl + S.
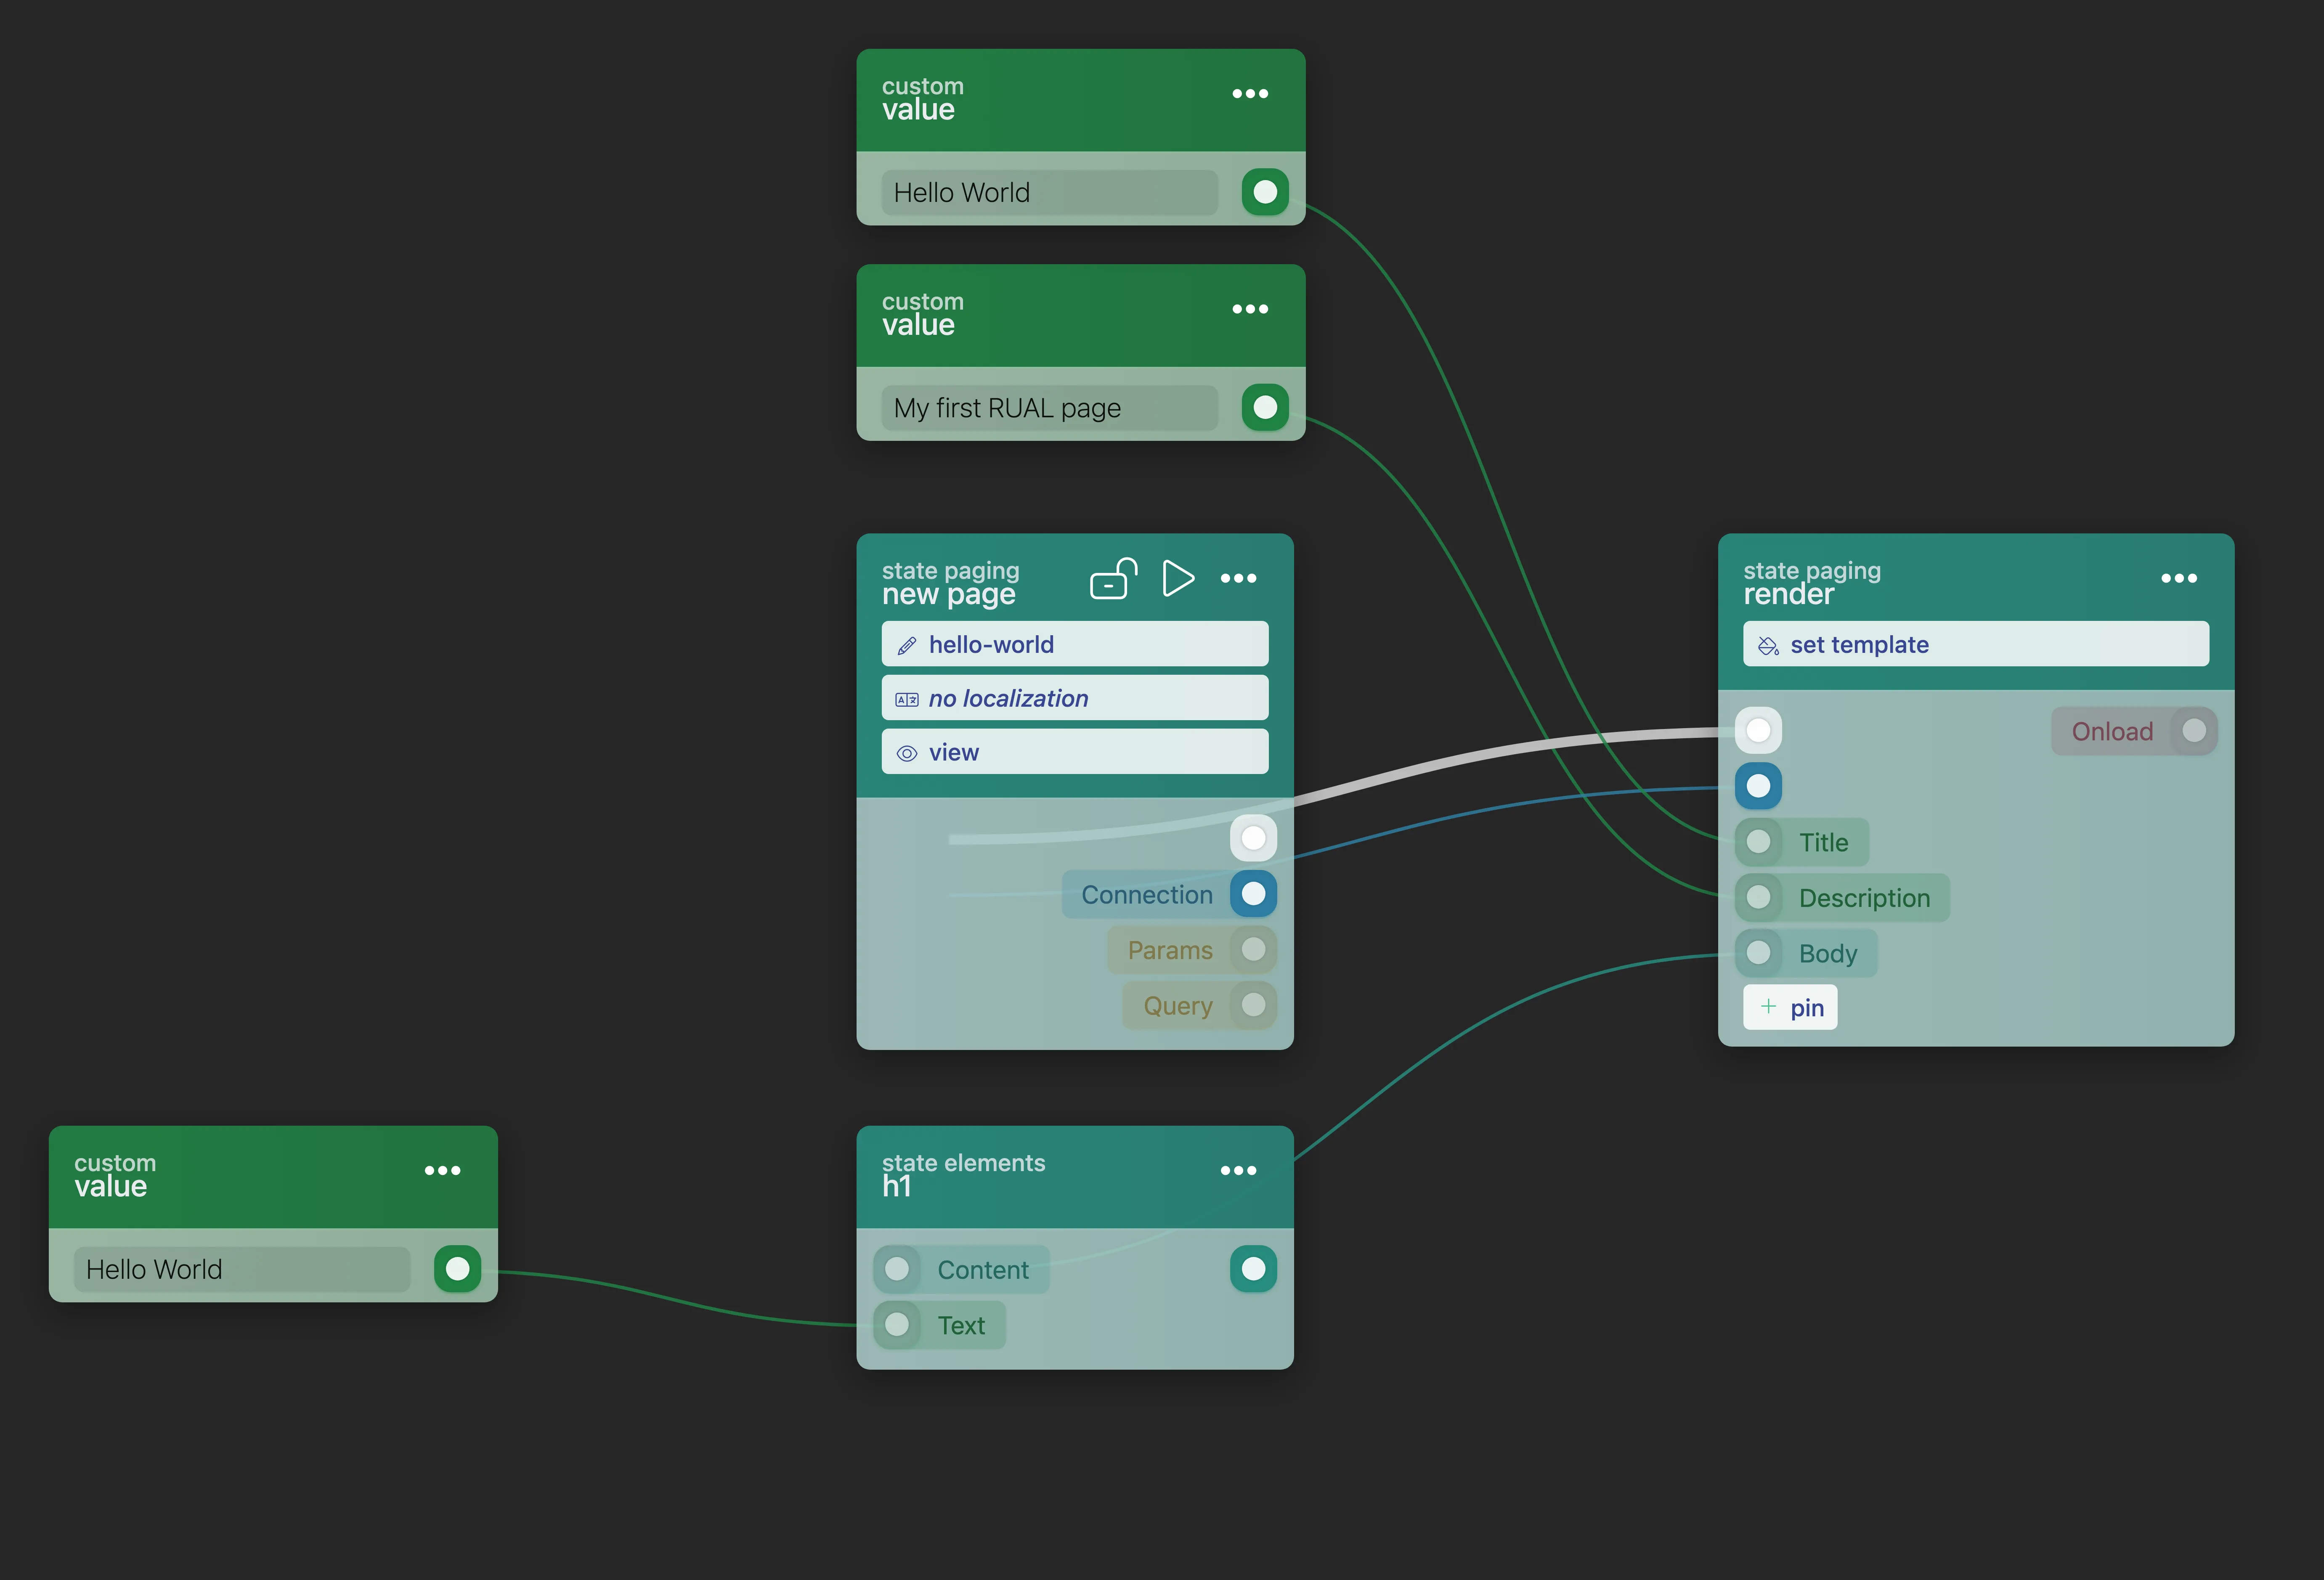
You just used the two connection kinds every blueprint is built from. flow pins control when a block runs, the execution order. Data pins such as value, object, and state carry what a block works on. You can only connect pins of compatible types. Read more in Block Execution.
4. Activate and Test
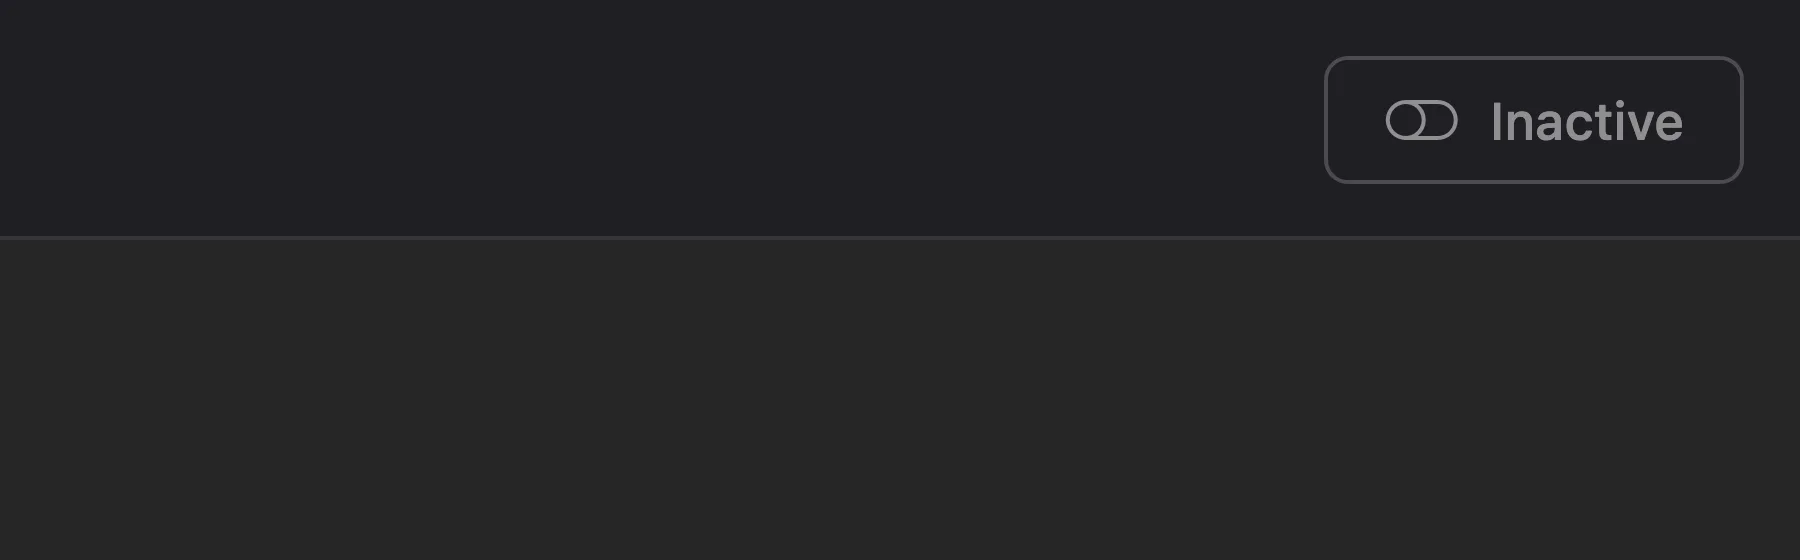
Pages, APIs, and modals are inactive by default. Click Activate in the top bar of the blueprint to make your page respond.
Then test the page in your browser:
- Open the page from RUAL Studio. Studio automatically redirects you with the
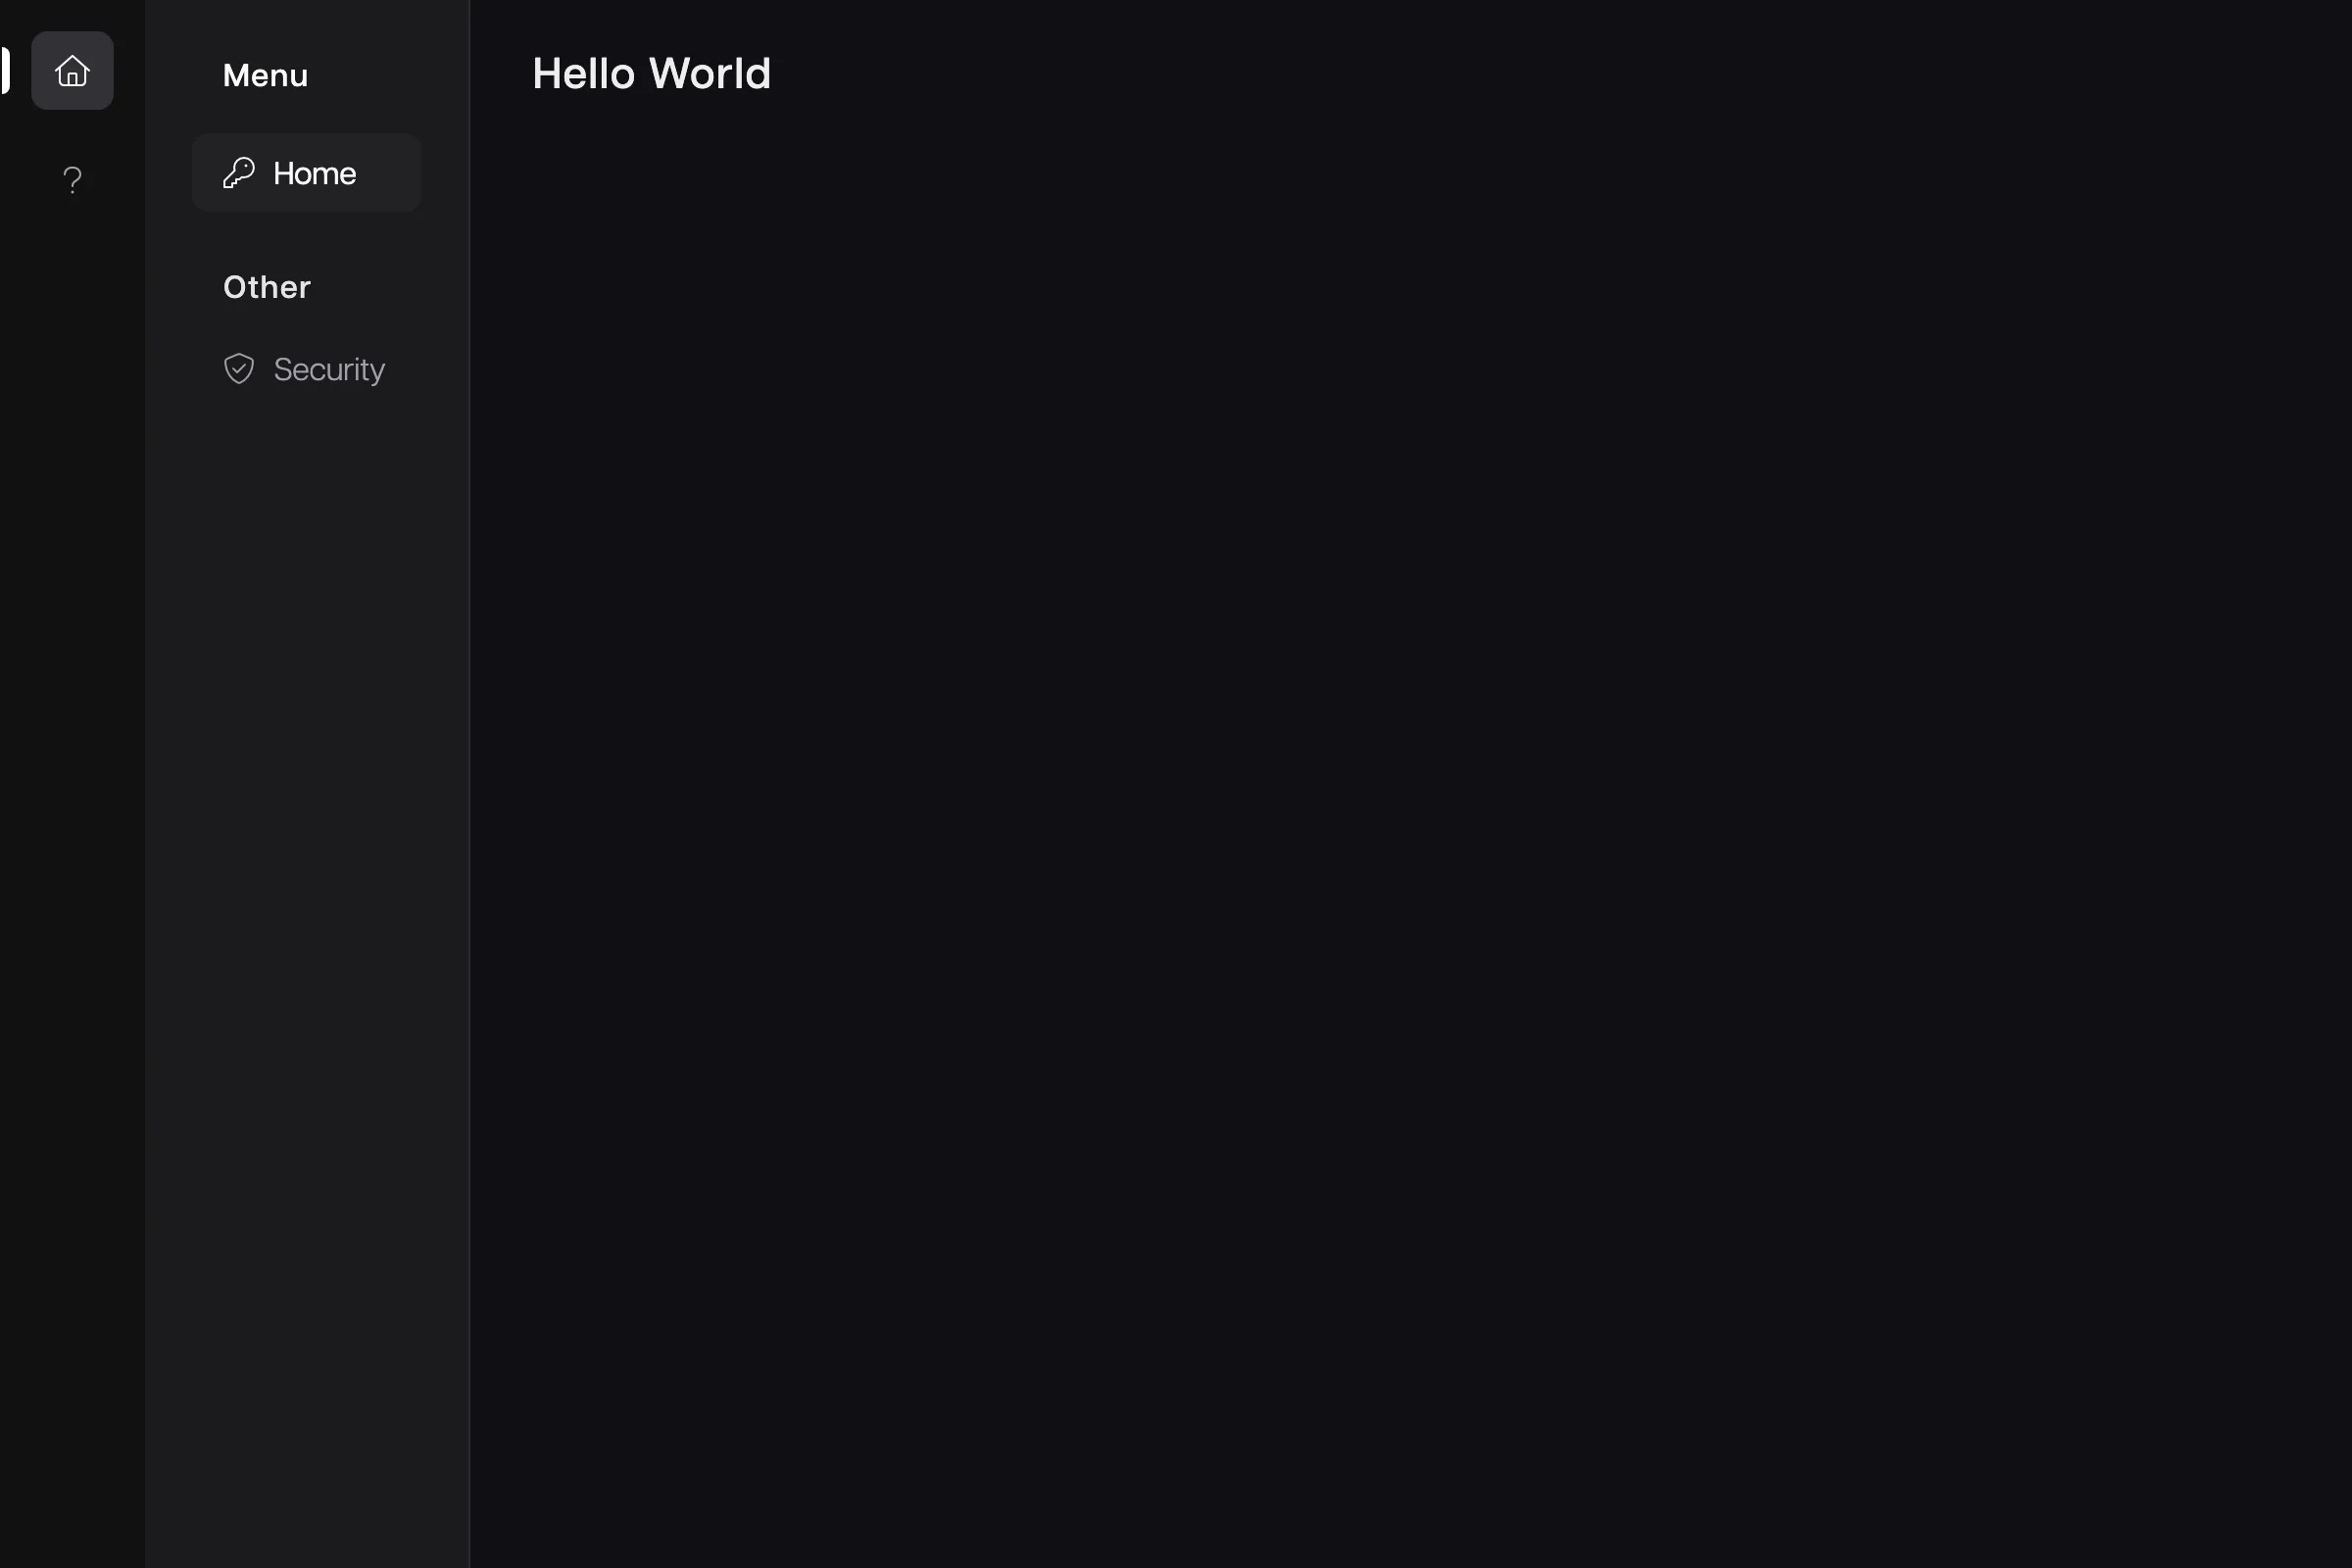
?developmentquery, so with a RUAL Developer account you see your saved, not yet deployed, blueprint. - You should see a plain page with your Hello World heading. If not, check that you saved and activated the blueprint.
- To execute the non-deployed blueprint against production data, select
Production Runwithin your blueprint.
Visitors only see the page after you deploy it to production. Saving keeps changes in development; deploying is a separate step. See How to Deploy.
5. Your First API Endpoint
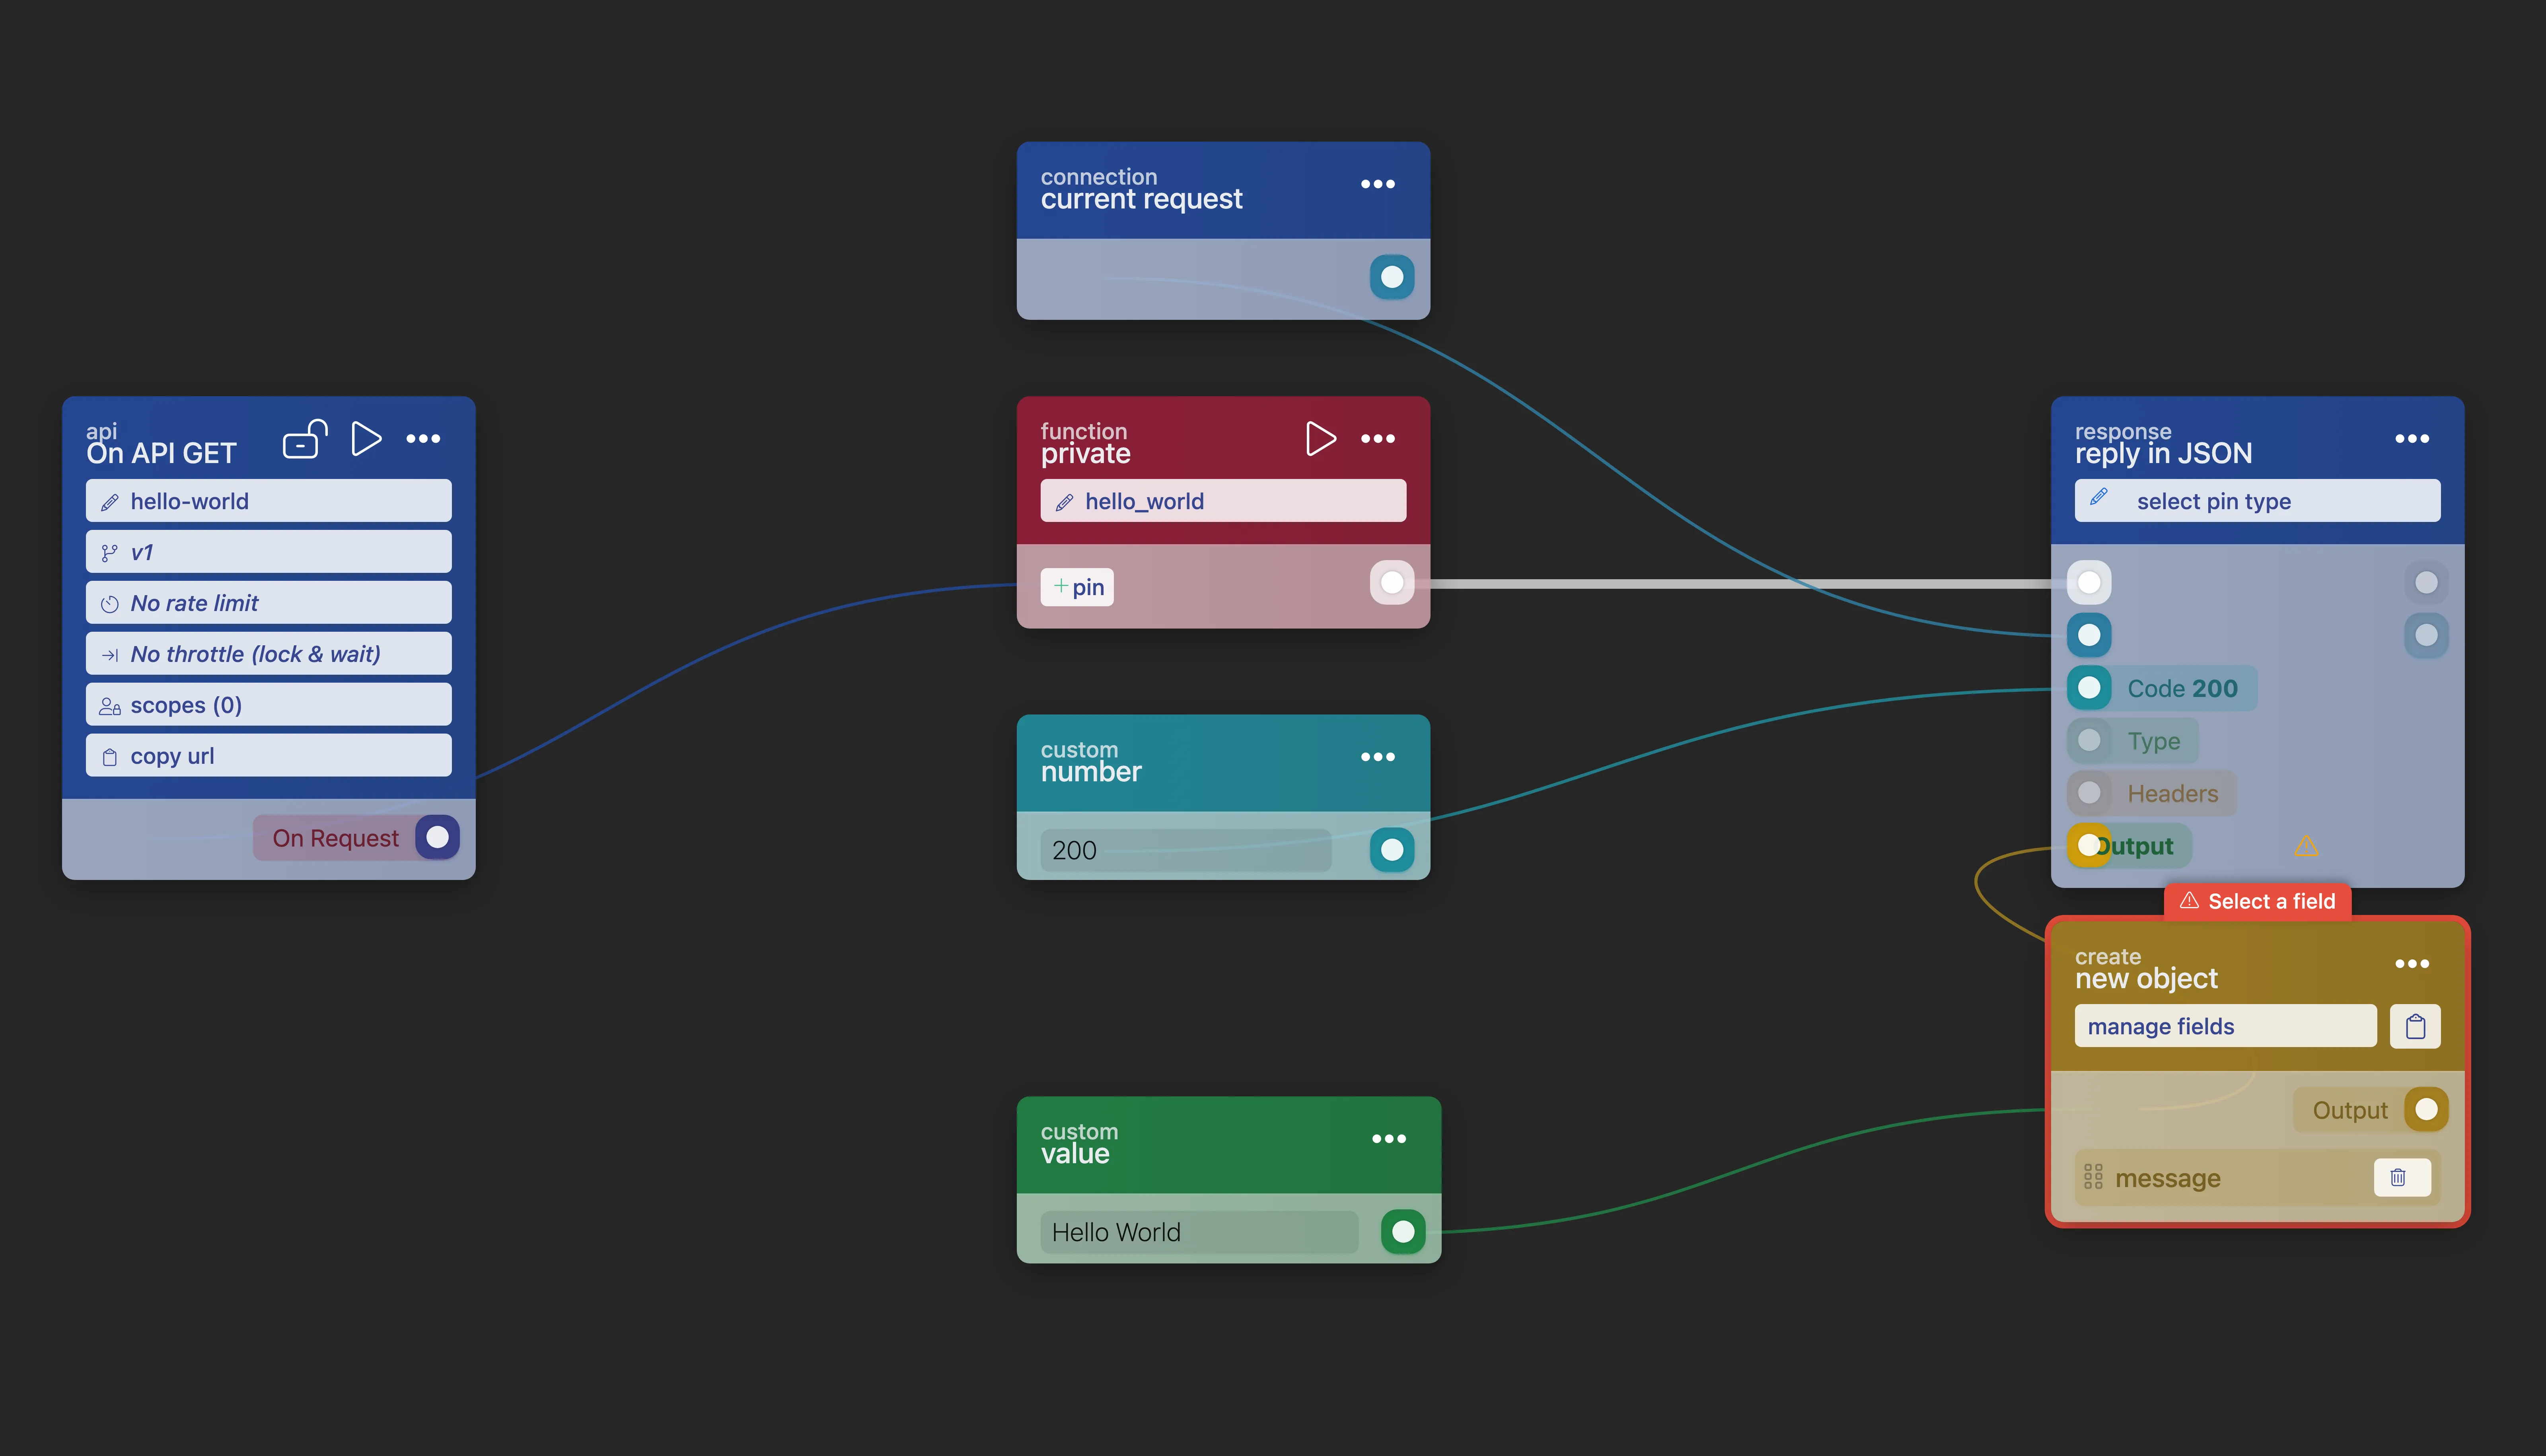
An API endpoint is a blueprint too. Create a new blueprint of type Build an API endpoint and name it, for example, Hello World API. The canvas is seeded with an on_startup_register_uri_get block, which exposes a GET URI under /api/. Set the URI to hello-world: your endpoint becomes /api/hello-world.
Build the response flow with these blocks:
| Block | Display Name | Role |
|---|---|---|
on_startup_register_uri_get |
on api get | Registers GET /api/hello-world and starts the flow on each request. |
trigger_custom_function |
create | The function that runs on every request. |
httpconnection_set_json |
reply in json | Sends the JSON body and status code back to the caller. |
httpconnection_current_request |
current request | Reference to the incoming HTTP connection. |
object_new_fields |
new object | Builds the {"message": ...} object. |
value_default |
value | The Hello World text. |
number_default |
number | The 200 status code. |
- Create the handler function. Drag from the
On Requestout-pin into an empty area and create a function. Name it, for example,hello_world. Itsflowout-pin runs on every request. - Add the reply block. Add a
httpconnection_set_jsonblock and connect the function'sflowout-pin to itsflowin-pin. - Connect the request. Add a
httpconnection_current_requestblock and connect it to theconnectionin-pin. - Set the status code. Add a
number_defaultblock with200and connect it to thecodein-pin. - Build the JSON body. Add an
object_new_fieldsblock with a fieldmessage, connect avalue_defaultholdingHello Worldto that field, and connect the object out-pin to thedatain-pin: objects are cast to a JSON value automatically. - Save and activate.
Cmd/Ctrl + S, thenActivatein the top bar.
Call your endpoint from any terminal:
curl https://<your-cluster>/api/hello-world{
"message": "Hello World"
}New pages and APIs use the *public scope by default, so anyone can call them. To restrict access, click the lock icon on the block to open the Scopes Management Modal and assign scopes. See Remote Access Control. Your cluster also ships 40+ built-in REST APIs for managing blueprints, users, and storage, documented under Cluster APIs.
6. Next Steps
You created two blueprints, wired flow and data pins, activated a page and an API, and tested both. Where to go from here:
Core Concepts Blueprints, blocks, pins, flows, storage, and deployment. The mental model behind everything you just did. Build Your First CRUD App A full tutorial: create, list, update, delete, and search tasks with blueprints and built-in storage. Tips & Tricks Work faster on the canvas: drag-to-connect, auto-created blocks, selection, search, and the minimap.Frequently asked
How do I create my first blueprint in RUAL?
Open the blueprints overview in RUAL Studio and create a new blueprint, then pick the blueprint type. Choosing Build a UI Page seeds the canvas with a state_page block, which is the starting block of every page flow.
Why does my RUAL page or API not respond after I save it?
Saving is not enough. A blueprint only starts responding after you press Activate in the top bar. Until then the page or endpoint stays silent, even though the blueprint is saved.
How do I test a RUAL endpoint before deploying it?
Append ?development to the URL. That calls the saved version of the blueprint. Without it you are calling the last deployed version, which does not include your unsaved or undeployed changes.