Build Your First API
A step-by-step tutorial: register a GET endpoint, search your storage, reply in JSON, validate request parameters, secure the endpoint with scopes, and test it with curl.
In this tutorial you build a real API endpoint: GET /api/v1/tasks, which returns the open tasks from the tasks storage as JSON. It picks up where the Quickstart left off. The quickstart shows the smallest possible endpoint in five minutes; this page goes deeper into URIs, storage queries, validation, and security. If you followed Build Your First CRUD App, you already have the tasks storage this endpoint reads from.
1. Create the API Blueprint
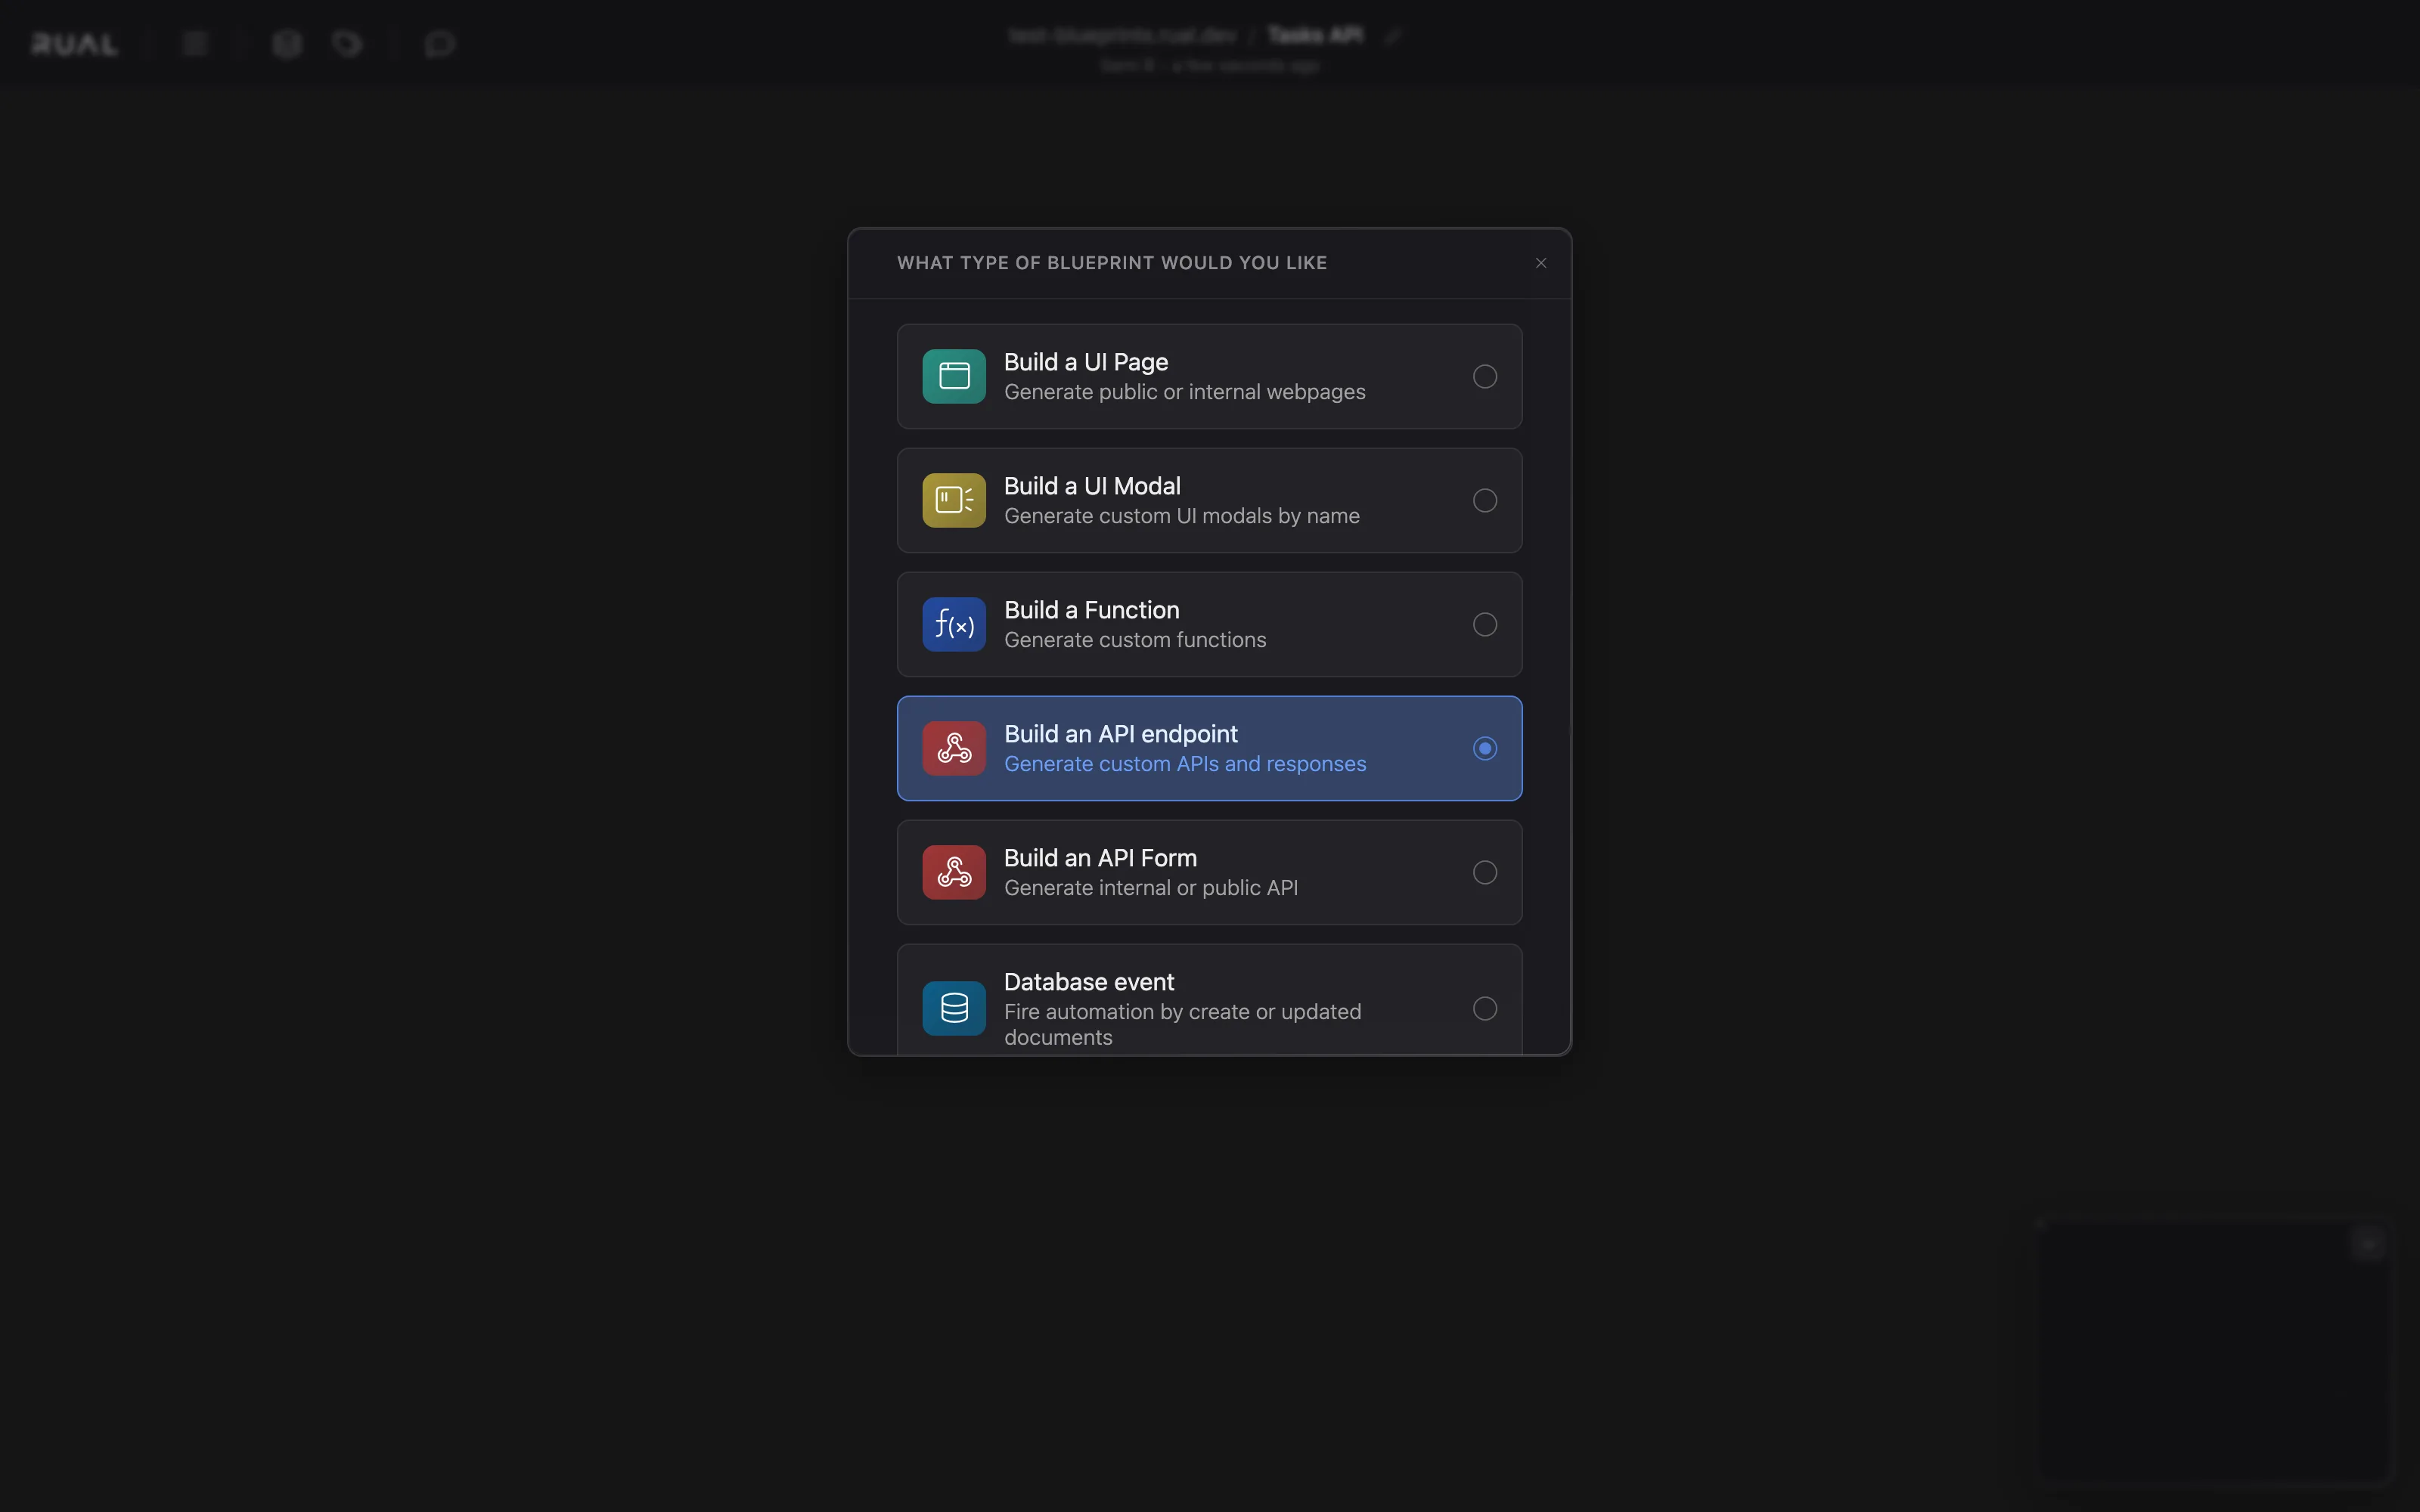
An API endpoint lives in its own blueprint. Open the blueprints overview in RUAL Studio, create a new blueprint, and choose the type Build an API endpoint. This seeds the canvas with an on_startup_register_uri_get block. The trigger that starts your flow on every incoming request.
Name the blueprint after what it serves, for example Tasks API. One blueprint per endpoint (or per small group of related endpoints) keeps flows readable, similar to assigning a single class to a file in traditional coding.
2. Define the Endpoint
The trigger block carries the endpoint definition. Set the URI field to v1/tasks. The block exposes URIs under /api/, so your endpoint becomes GET /api/v1/tasks. Prefixing with a version like v1 is a convention, not a requirement, but it lets you introduce v2 later without breaking existing consumers.
The seeded block answers GET requests. Other methods have their own trigger blocks: for example on_startup_register_uri_post for POST: and a single blueprint can hold several of them when the endpoints belong together.
URIs can be multiple segments deep and may include named parameters such as v1/tasks/:guid. You will read those parameters in step 5.
Keep the URI lowercase and plural, v1/tasks, not v1/getTasks. The URI is the public contract of your endpoint.
3. Create the Handler Function
The trigger block does not contain logic itself. It hands each request to a function. Drag from the block's function out-pin into an empty area of the canvas and create a trigger_custom_function, naming it list_tasks. From then on, the function's flow out-pin runs on every request to GET /api/v1/tasks.
Functions are private to their blueprint by default and can be reused from other flows with function_custom_execute: handy when a page flow and an API endpoint need the same query logic.
4. Read Data and Reply in JSON
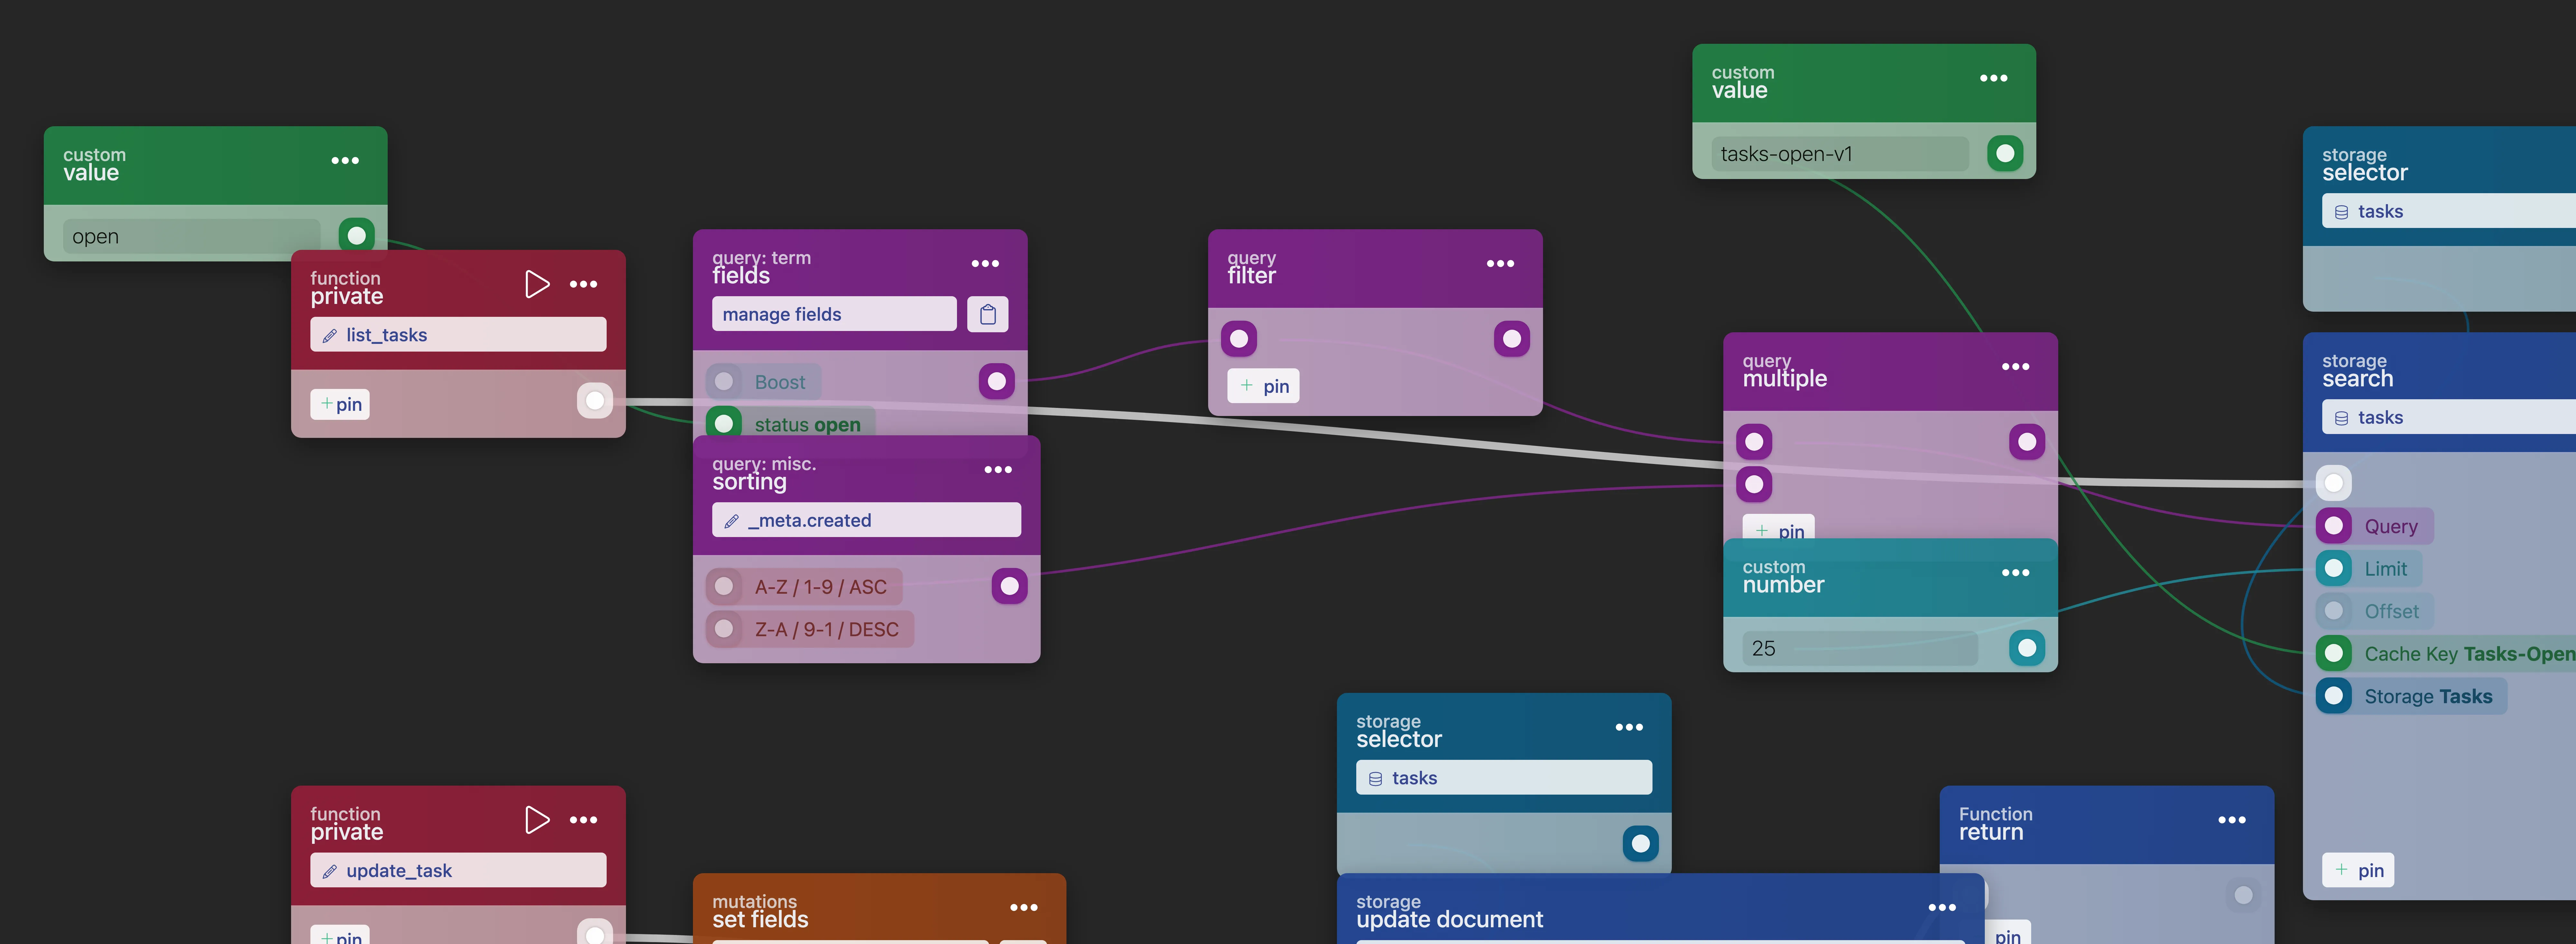
Inside the function, search the tasks storage and send the results back with httpconnection_set_json. Wire the blocks like this:
| Block | Purpose | Connects To |
|---|---|---|
storage (tasks) |
Selects the storage to search | function_search (storage pin) |
query_bool_term_fields (status = open) |
Match only open tasks | query_bool_filter |
query_bool_filter |
Wrap the term query in an efficient filter context | query_and |
query_sort_field (_meta.created, desc) |
Newest tasks first | query_and |
query_and |
Combine filter and sort into one query | function_search (query pin) |
number_default (50) |
Limit the result set | function_search (limit pin) |
function_search |
Runs the search; outputs an array of documents |
httpconnection_set_json (data pin) |
httpconnection_current_request |
Reference to the incoming request | httpconnection_set_json (connection pin) |
number_default (200) |
The HTTP status code | httpconnection_set_json (code pin) |
Connect the function's flow out-pin to the flow in-pin of function_search, and from there to httpconnection_set_json. The flow pins control execution order, the data pins carry the results. Query composition is covered in depth under Building Search Queries.
5. Validate the Request
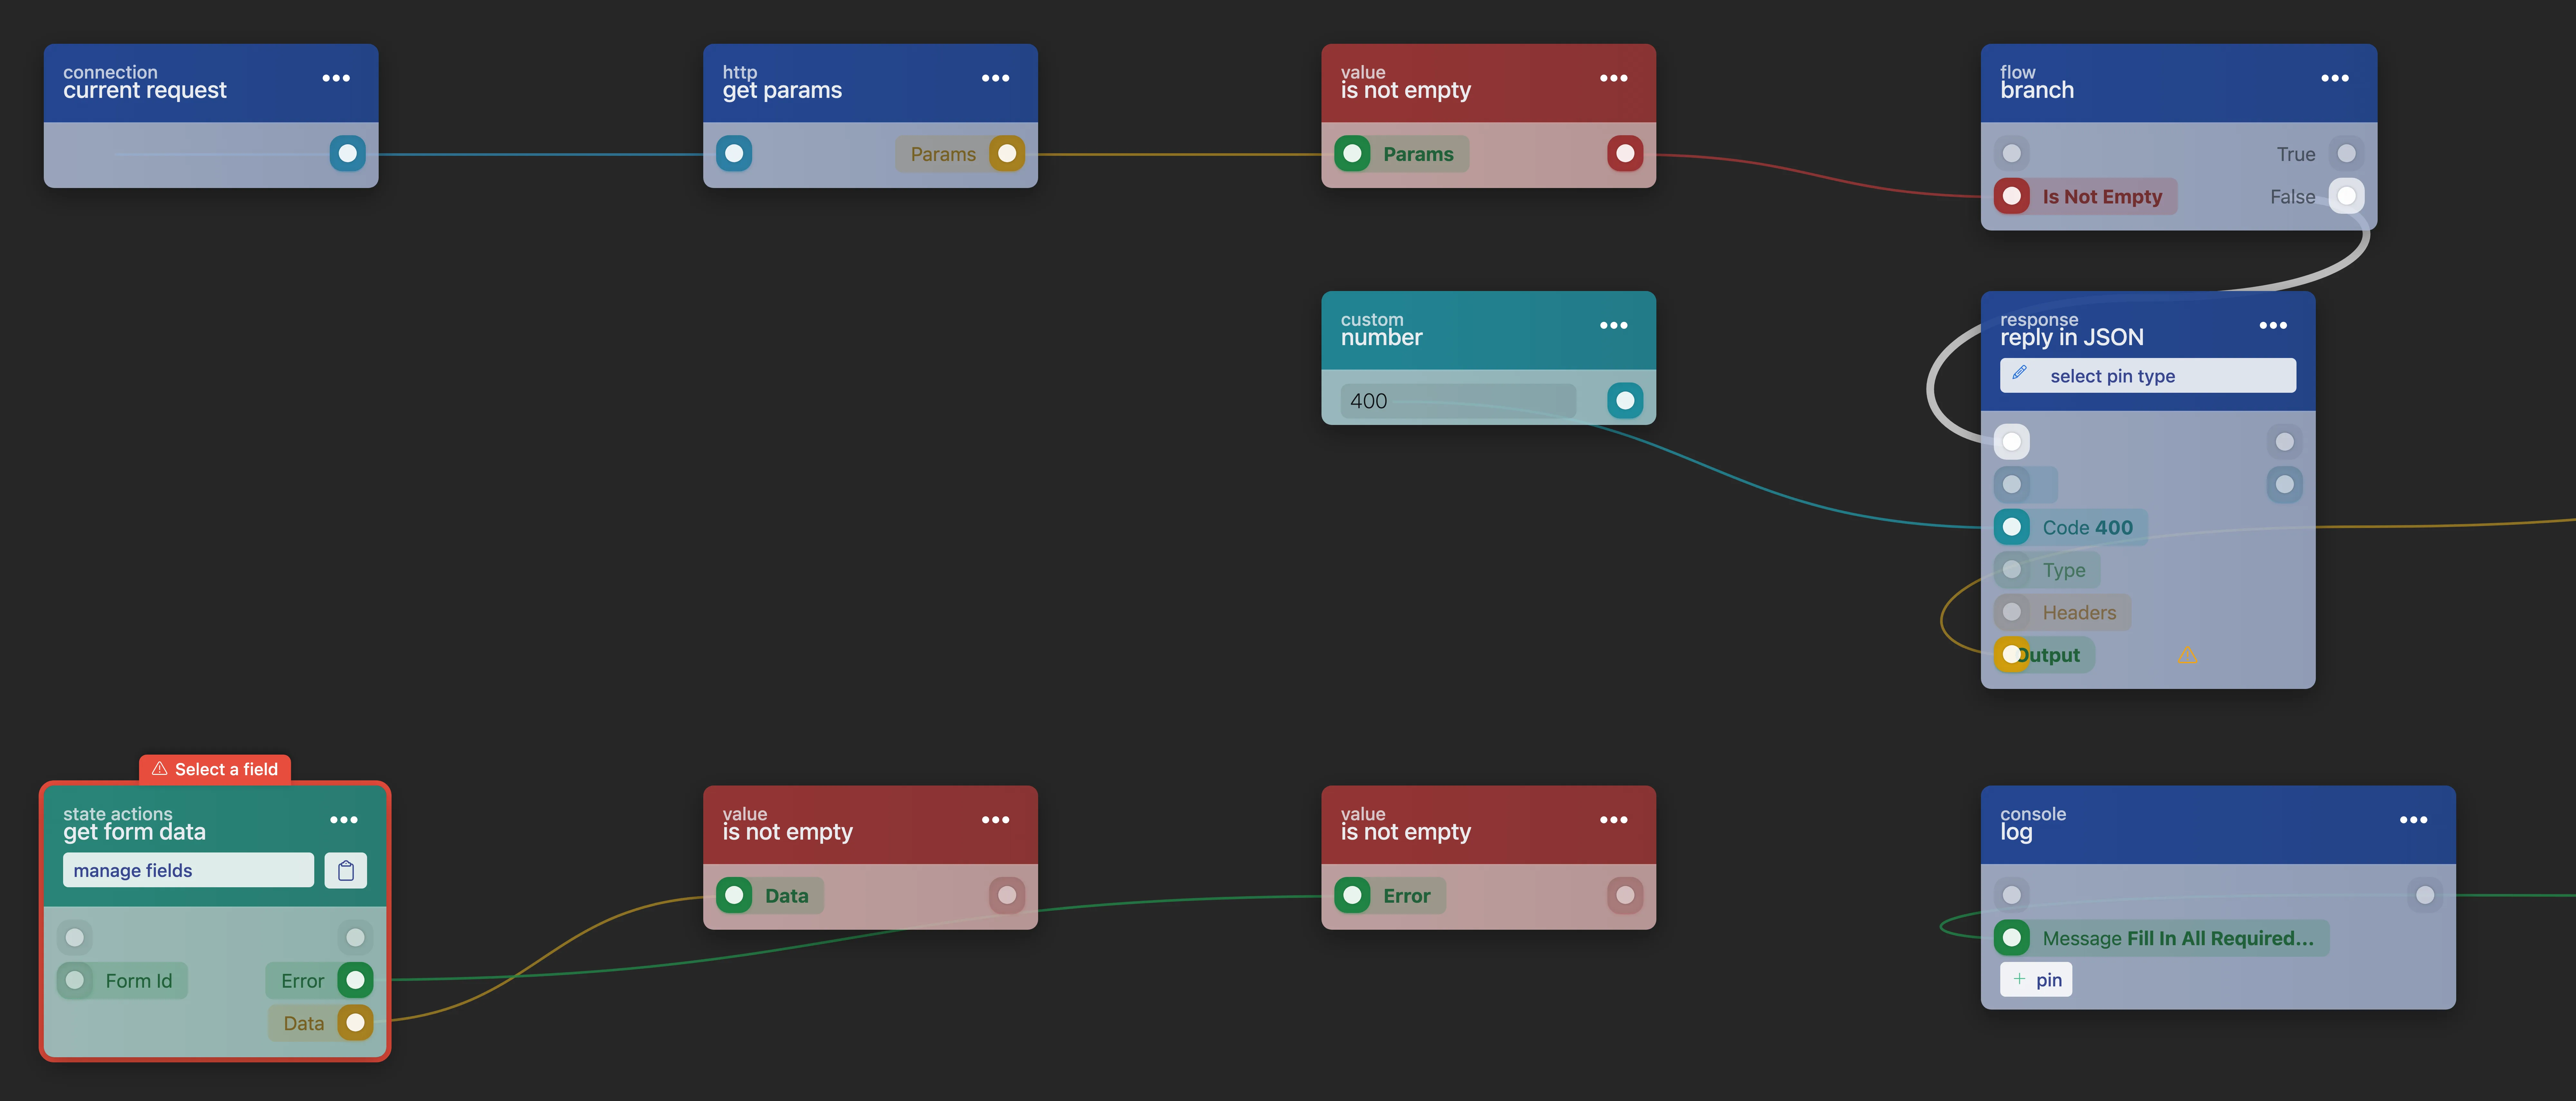
Real endpoints check their input before touching storage. Say you support an optional status parameter in the URI, declared as v1/tasks/:status. Read it with httpconnection_get_params. Connect httpconnection_current_request to its connection in-pin, and it outputs a params object containing status.
To make a parameter required, check it before running the search:
- Add a
condition_not_empty_valueblock and connect thestatusparam to it. - Add a
branchblock, connect the function's flow and the condition. It splits execution intotrueandfalsepaths. - On the
falsepath, reply with a secondhttpconnection_set_json: anumber_defaultof400on the code pin and anobject_new_fieldswith anerrorfield such asmissing required parameter: statuson the data pin. - On the
truepath, run the search from step 4: now using the param value in the term query instead of a fixed value.
Blocks like function_search also expose success and error out-pins. Use them to return a 500 with a useful message instead of failing silently. When a flow misbehaves, Debugging shows how to trace execution inside the blueprint.
6. Scopes and Security
New endpoints use the *public scope by default: anyone on the internet can call them. Click the lock icon on the trigger block to open the Scopes Management Modal and change that:
*loggedin: restrict the endpoint to users with a validaccess_token. Tokens are issued by the login APIs, are valid for 14 days, and are extended automatically while actively used.- Custom scopes. Create your own (for example
tasks-read) and assign them to only the users or groups that may call this endpoint.
Callers can pass a token five ways: an Authorization: Bearer header, an x-authtoken or x-token header, an access_token cookie, or ?access_token= in the query string.
The same modal also holds two per-endpoint protection switches: a rate limit (key type, max requests, timeframe in seconds: extra requests are blocked) and a throttle (key type plus a timeout, allowing one request per interval). Both are explained in detail under Remote Access Control.
100 requests per second that cannot be changed cluster-wide. Custom endpoints like the one you just built have no such fixed limit. Add a rate limit or throttle per endpoint when you need one. 7. Activate and Test
APIs are inactive by default. Save the blueprint (Cmd/Ctrl + S), then click Activate in the top bar. To test the saved, not yet deployed: version, call the endpoint in development view by appending ?development:
curl "https://<your-cluster>/api/v1/tasks?development"[
{
"_meta": {
"cms": 1752768000362,
"created": 1752768000,
"entity": 1,
"expiry": -1,
"guid": "b34686f50e1b04964250f13391274d85308c129a793c6ec97bc41870fc67081e",
"removed": 0,
"ums": 1752768000803,
"update_hash": "60e27209fa93063b5605e41605c2722ed428cae0",
"updated": 1752768000
},
"owner_guid": "a23575f49d0af385314c1f02280163374297e018a692e5e4ab85eb307ebf6ebc",
"owner_name": "joe doe",
"status": "open",
"title": "write the release notes"
}
]A 401 or 403 means the scope check failed: verify the lock icon shows the intended scope and that your token is passed correctly. Consumers only see the endpoint after you deploy the blueprint to production.
8. Next Steps
You registered a versioned GET endpoint, wired a storage query into a JSON reply, validated input with a branch, and secured the endpoint. Where to go from here:
Cluster APIs Your cluster ships 40+ built-in REST APIs for managing users, storage, and blueprints. Remote Access Control Scopes, the Scopes Management Modal, rate limiting, and throttling in full detail. Quickstart The 15-minute version: Hello World page plus a minimal JSON endpoint.Frequently asked
How do I build a REST API endpoint in RUAL?
Register the route with an on_startup_register_uri_get block in its own blueprint, query storage in the flow, and reply with a JSON body. Then save, press Activate, and deploy when you want production traffic to reach it.
How do I secure a custom RUAL API endpoint?
Assign a scope to the endpoint in the Scopes Management Modal. Callers then need a token carrying that scope. You can add a rate limit or a throttle per endpoint in the same modal.
Do custom RUAL endpoints have a rate limit by default?
No. The cluster's built-in public system APIs carry a fixed default of 100 requests per second, but custom endpoints have no fixed limit. Add a rate limit or throttle per endpoint when you need one.