Tips and tricks
Discover some valuable tips and tricks for efficient blueprinting, designed to help you navigate and work with blueprints more effectively.
Establishing Block Connections
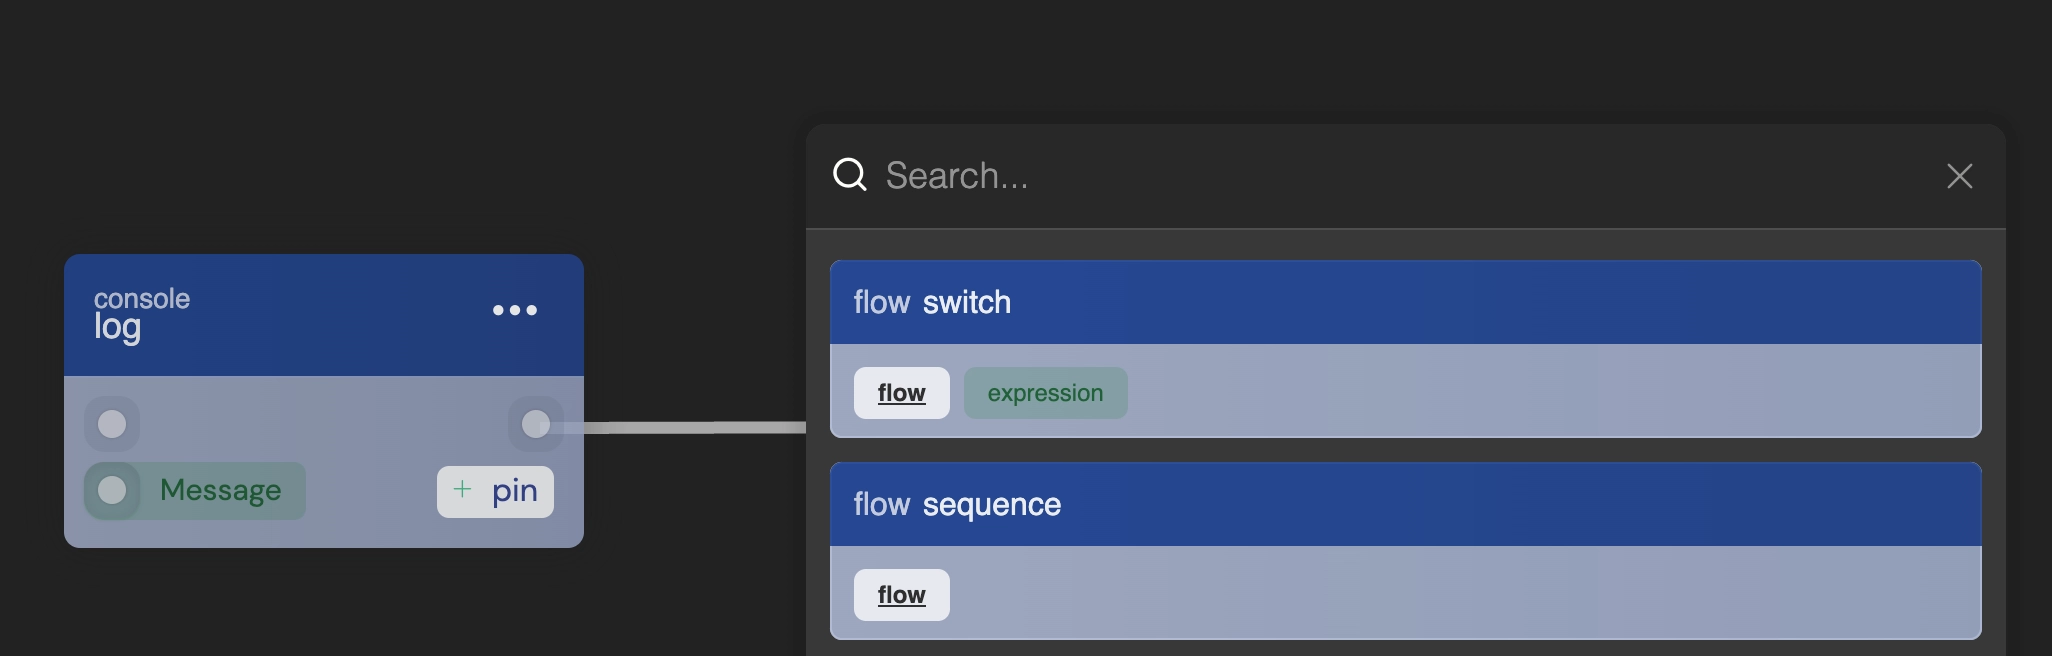
When you wish to connect two blocks, you can achieve this by simply left-clicking on the output pin and dragging it into the input pin, or vice versa. Additionally, connections can be established automatically when you drag out of a pin and create a new block directly from the search results that appear when you release the pin in the empty area of the blueprint. The system will attempt to provide you with blocks that are similar in type to the pin you initially dragged out.
Automatic Block Creation
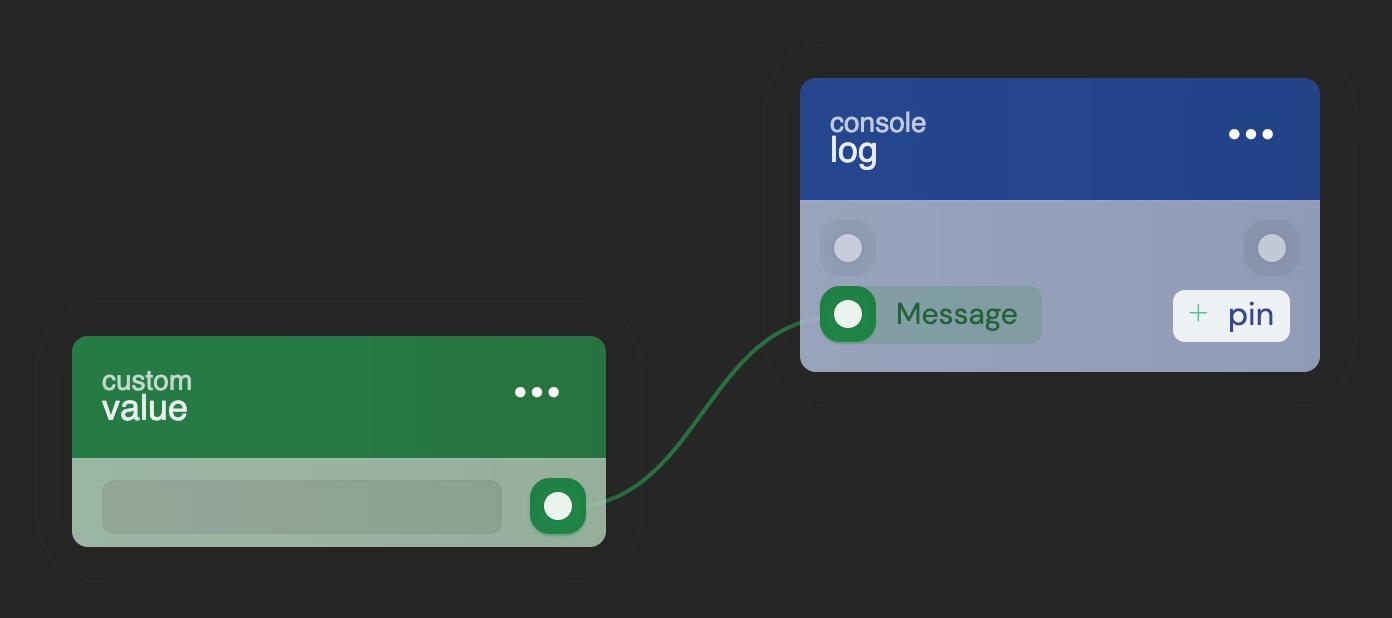
For increased efficiency in blueprint workflows, certain blocks are generated automatically when you perform a right-click drag action from an in-pin or out-pin to the blueprint background. This feature is primarily employed with value pins, especially in conjunction with the custom value block.
Here is a list of blocks that are automatically generated when you perform a right-click drag:
| Pin Type | Block Created |
|---|---|
state |
state_text |
file |
file_custom |
date |
date_currentdate |
object |
object_new_fields (in-pin), object_update_fields (out-pin) |
value |
value_default |
uiclass |
uiclass_custom |
uistyle |
uistyle_custom |
fielddefinitions |
fielddefinitions_get_multiple |
array |
array_values_default |
storage |
storage |
user |
user_current |
flow |
function_custom_execute (out-pin) |
condition |
condition_is_true |
inpinfunction |
inpinfunction_select |
Smart Pin Reveal
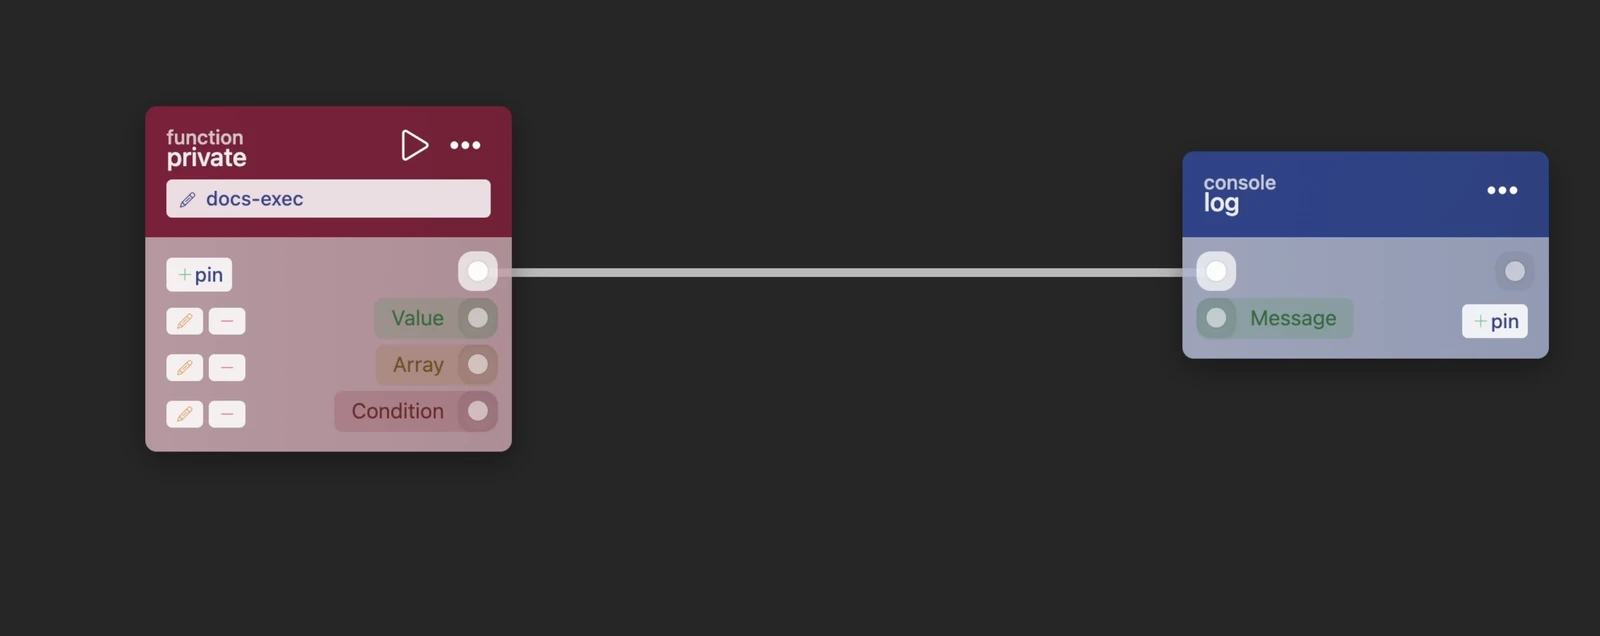
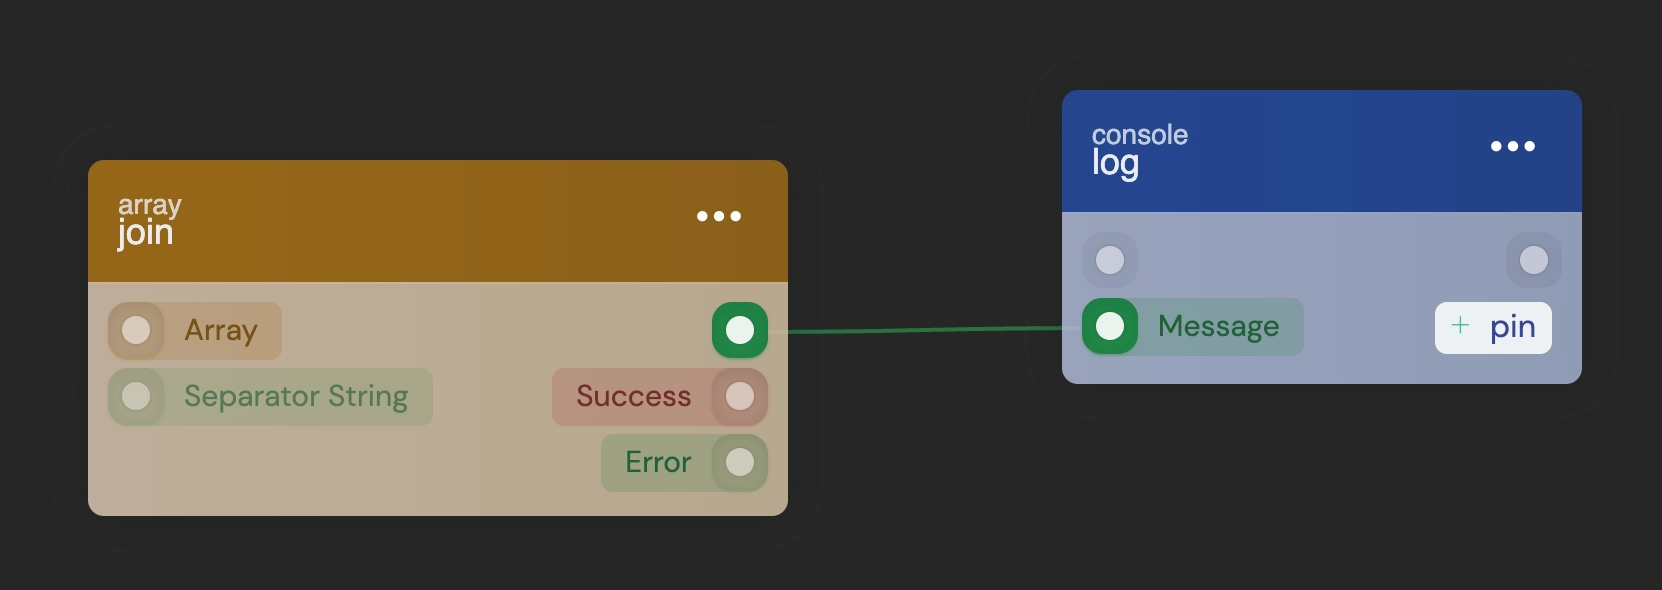
To keep blueprints uncluttered, blocks don't always show every pin they support — many keep their less-common in-pins hidden until they're actually needed. When you start dragging a connection out of an out-pin, every block on the canvas inspects the type you're carrying and automatically reveals any hidden in-pin that can accept it. Just drag from the out-pin of one block toward another, and the matching in-pin pops up so you can drop the connection straight onto it — there's no need to add the pin by hand first.
As you drag, the connection wire is colour-coded to the pin's type (for example value, array, or condition) and a small label shows the pin's name and type. In-pins of incompatible types stay hidden, so you only ever see the connections that are actually valid.
Selecting blocks
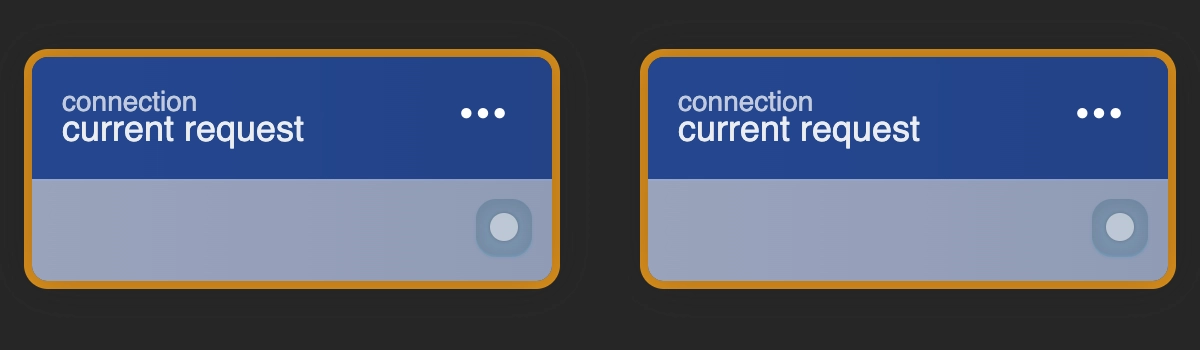
You can select any block within the blueprint by clicking on its header area, which is typically the darker-colored part of the block. Once selected, an orange border will appear around the block, indicating your selection. To select multiple blocks at once, you can hold down Cmd/Ctrl and click on another unselected block. Clicking on a block that's already selected will deselect it. Alternatively, you can select multiple blocks by right-clicking and dragging to create a dark selection area. Simply extend this area over the blocks you wish to select.
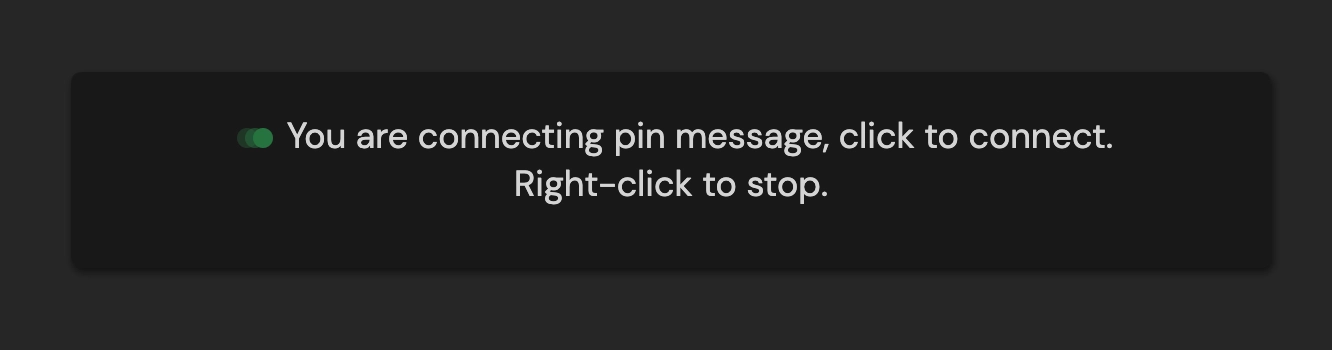
Connecting Distant Blocks
Occasionally, the block you wish to connect to may be located outside your current viewport, necessitating a shift in your view. It's not possible to drag a connection directly from the current pin to the distant one. To address this scenario, we've introduced the double-click option. Simply double-click on the pin you intend to connect, pan to the new block, and click once on the target pin. This sequence establishes the connection.
Disconnecting blocks
If you need to disconnect two or more blocks that are linked, you can achieve this by simply right-clicking on the relevant pin. This action will sever the connection between the blocks on both ends. In cases where a pin has multiple connections, a modal will prompt you for confirmation before proceeding.
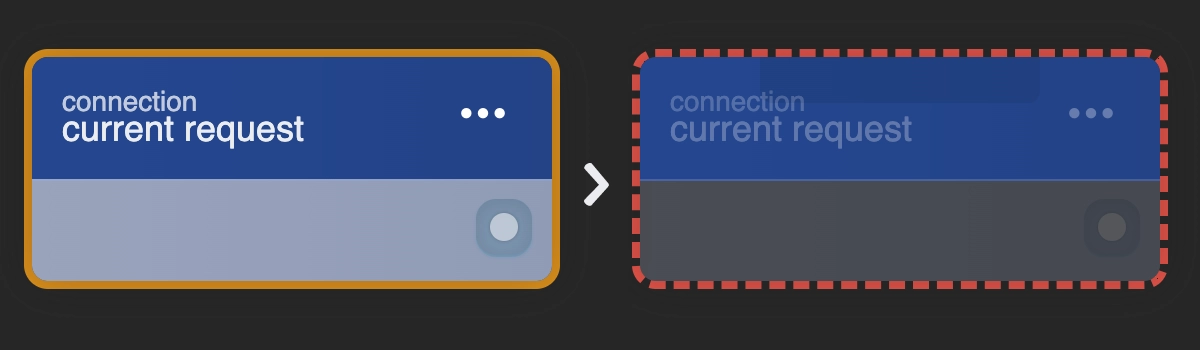
Removing a block
After selecting one or multiple blocks, you can remove them by pressing backspace on your keyboard. The block will turn opaque and be outlined with a red dashed border, indicating it has been removed but not yet permanently deleted. To finalize the deletion, simply save the blueprint using the save your changes button, after which the block will permanently disappear.
Staging and saving a blueprint
After making modifications in your blueprint, you can save them using the save your changes button. However, if you wish to quickly toggle between the blueprint and your pages to view these changes, you can append ?staging to the URL of the page you're reviewing. This allows you to see the changes without having to save each one. Alternatively, you can use the shortcut Cmd/Ctrl + S to save and deploy your changes in the blueprint swiftly.

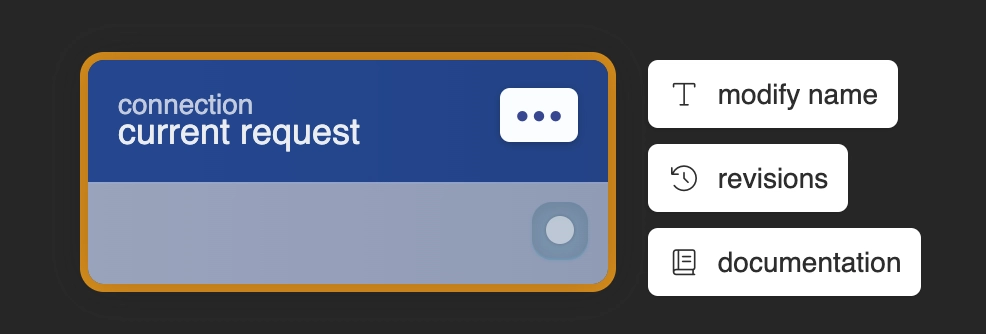
Block options
Each block in the blueprint comes with its own set of options. By clicking on the three dots at the top of a block, a menu will appear, offering block-specific functionalities. However, the following options are always included:
Modify name: This feature enables you to change the block's name, facilitating easier documentation of a particular flow without needing to use a comment block.Revisions: Selecting this option opens the logbook, but it's limited to the audit history of that specific block, allowing you to quickly review recent changes affecting it.Documentation: This opens a new tab with the documentation specific to that block.
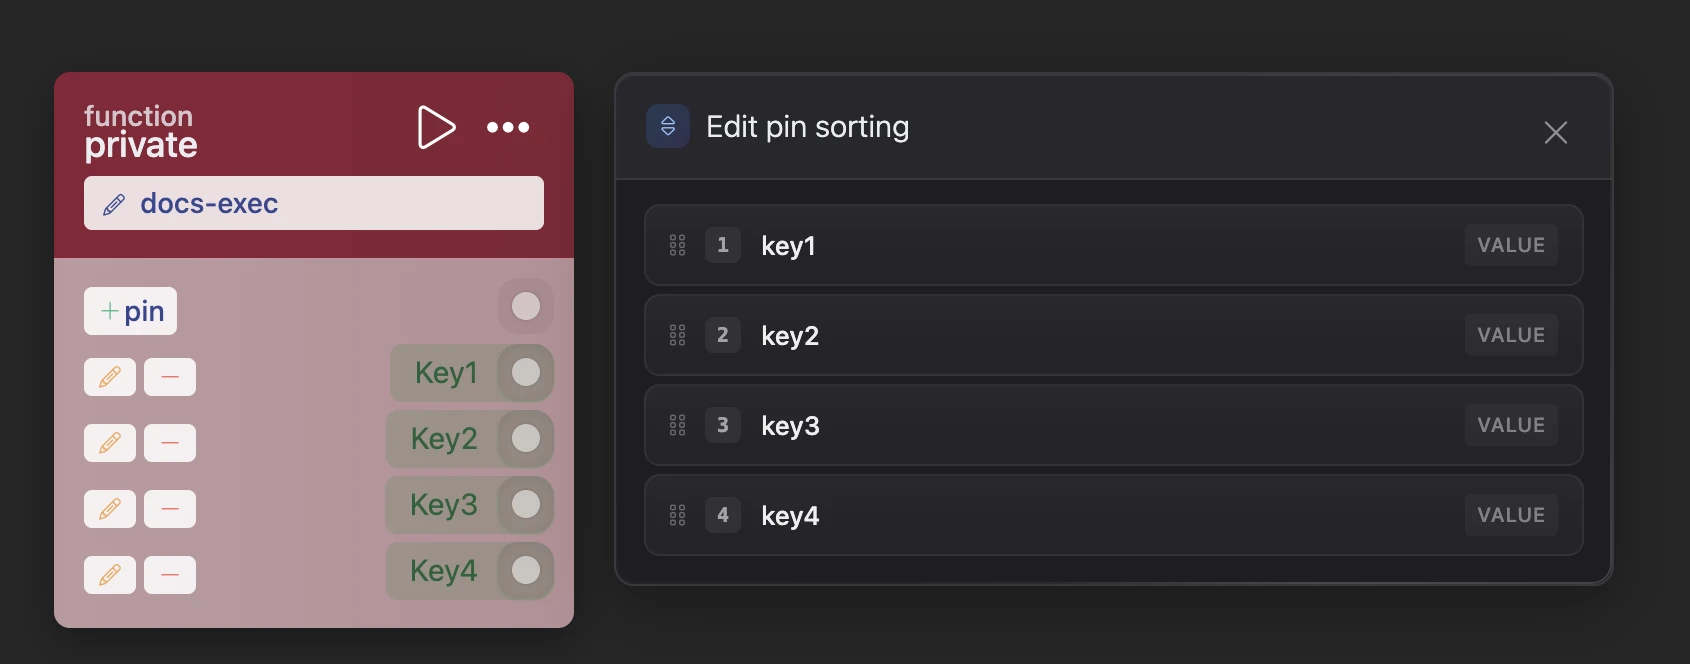
Edit pin sorting
Blocks that expose several pins of the same type — such as the multiple out-pins on a private function block — let you control the order in which those pins appear. Open the block's options menu via the three dots and choose Edit pin sorting to bring up the sorting popup.
In the popup, each pin is listed with its current position number. Grab the handle on the left of any row and drag it up or down to reorder the pins; the numbering updates as you go. Once you save the blueprint, the pins on the block are rearranged to match the new order, keeping busy blocks tidy and making their connections easier to follow.
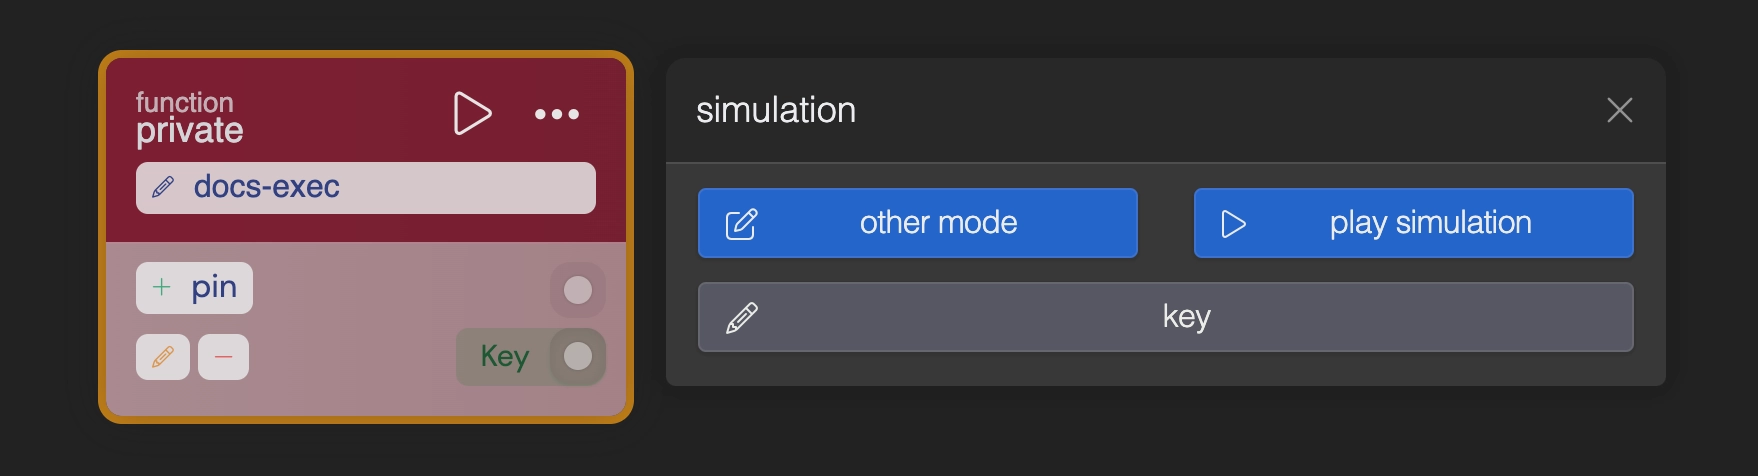
Simulating Functions
Certain blocks, particularly those at the beginning of a flow, feature a play icon. Clicking this icon triggers a popup where you can switch between different play modes, activate the current mode (default is 'simulation'), and adjust simulation values. For instance, in the example below, key represents an out-pin whose value can be modified. During simulation, this value is passed to the connected blocks. The simulation mode is particularly useful for thorough end-stage debugging.
When configuring simulation values, it's essential to use the correct format based on the data type. The table below provides the proper formatting syntax for each type, ensuring your simulations run accurately and produce expected results:
| Pin Type | Formatting |
|---|---|
date |
1749321690 (timestamp as number) |
number |
1 |
object |
{"key": "value} or {} |
value |
"value" or "" |
uiclass |
"uiclass" or "" |
uiattributes |
{"loading": "lazy"} or {} |
uistyle |
{"background": "grey"} or {} |
array |
["value1", "value2"] or [] |
condition |
true or false |
Blueprint namespacing
When managing numerous functions used across different blueprints, it's advisable to organize them with namespaces. Instead of manually prefixing each function, we recommend utilizing the built-in namespace feature. By clicking on the blueprint's title at the top, a popup will appear, allowing you to add a namespace.
Entering a namespace here will automatically prepend it to all existing functions, both public and private, within the blueprint. Consequently, when these functions are referenced in other blueprints, they will display with the specified namespace prefix, clearly indicating their origin blueprint for easier identification and organization.

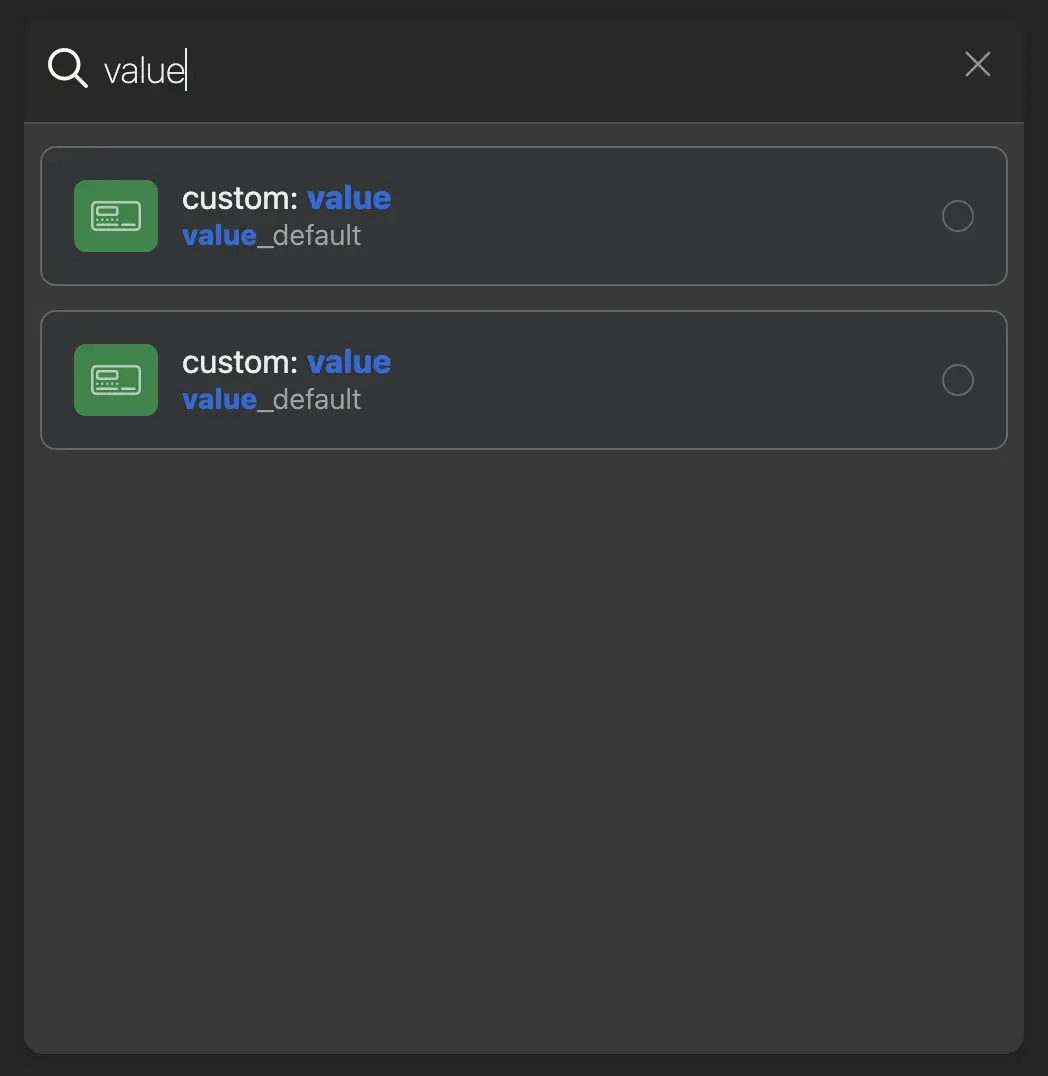
Blueprint block searching
You can press Ctrl + F to open the search bar at the bottom left of your screen. This makes it easy to quickly locate blocks or values within the cluster you're working in, saving you from endlessly scrolling to find a specific block. Clicking on a search result will automatically take you to the desired block within your blueprint. This feature is especially helpful when you're working in a blueprint you're not very familiar with.
This works for most block types. Except for translated data, which unfortunately aren't searchable.
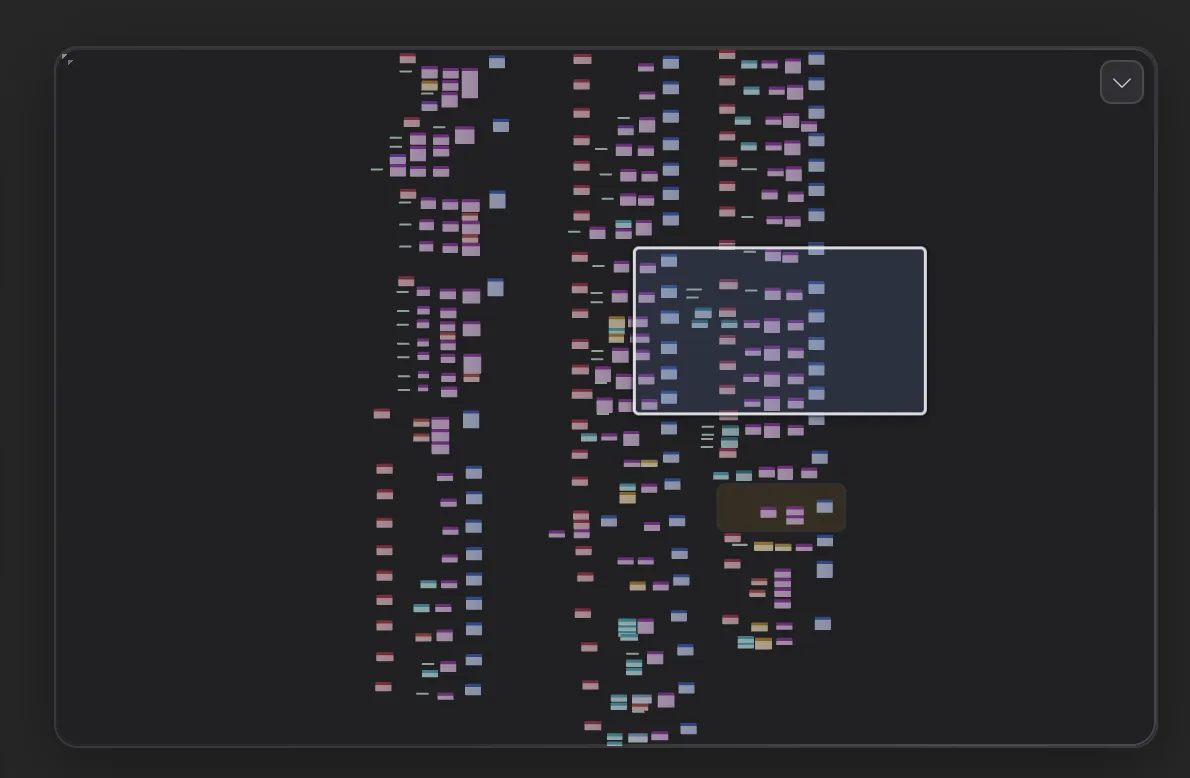
Minimap
For larger blueprints, a minimap is available in the bottom-right corner of the screen, giving you a bird's-eye view of the entire blueprint. Every block is plotted on it as a small marker, and the highlighted rectangle represents your current viewport — so you can see at a glance where you are within the wider blueprint and how much surrounds you off-screen.
The minimap is resizable, so you can drag it to whatever dimensions suit your workflow, making it easy to track your position and navigate around even the most sprawling blueprints.
Testing and collaboration habits
A few habits that pay off once blueprints get serious:
- Simulate before you activate. Every trigger block has a play button: run the flow with simulation values and inspect each out-pin before it ever sees production. Full technique in Debugging Blueprints.
- Comment as you go: right-click → Add comment on anything non-obvious; future-you and your teammates will thank you. Warnings mark do-not-touch areas; markers ping collaborators to a spot.
- Review changes before saving. The
changescounter in the bottom bar expands into a per-block diff; check it the way you'd check a git diff before committing. - Use the Timeline for archaeology. The blueprint Timeline replays every save with author and timestamp; block-level Revisions give the same for a single block (see audit log).
- Split when two people fight over one canvas: functions in a shared blueprint, per-feature blueprints elsewhere (see Best Practices).